Mazda 3 Service Manual: Joint Shaft Assembly [Mzr 2.0, Mzr 2.5 (MTX)]
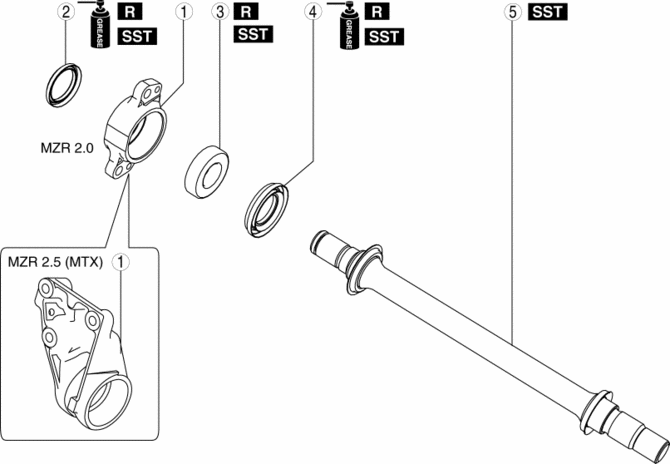
1. Assemble in the order indicated in the table.
|
1 |
Bracket |
|
2 |
Dust seal (RH) . |
|
3 |
Bearing . |
|
4 |
Dust seal (LH) . |
|
5 |
Joint shaft . |
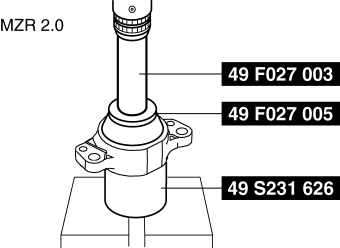
Dust Seal (RH) Assembly Note
1. Apply grease to a new dust seal lip.
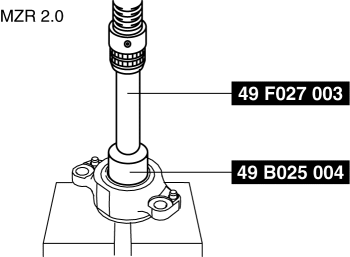
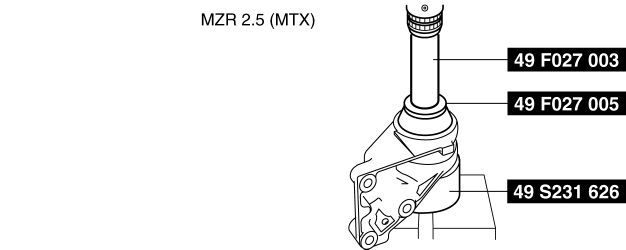
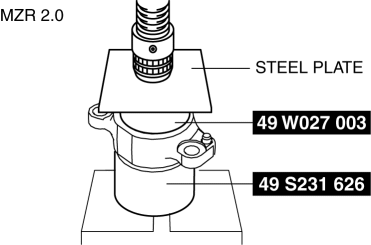
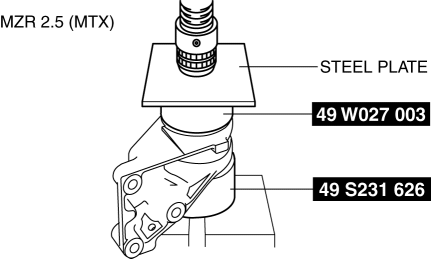
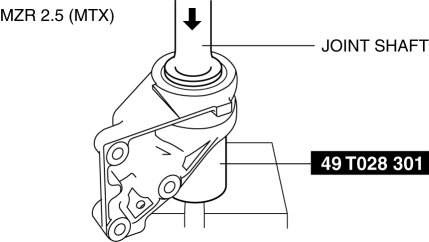
2. Install the dust seal (RH) using the SSTs
.
Bearing Assembly Note
1. Install a new bearing using the SSTs
.
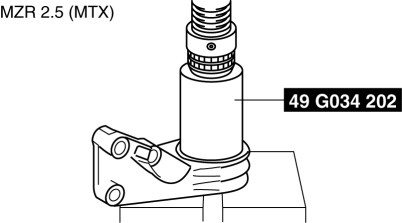
Dust Seal (LH) Assembly Note
1. Apply grease to a new dust seal lip.
2. Install a new dust seal (LH) using the steel plate and the SSTs
.
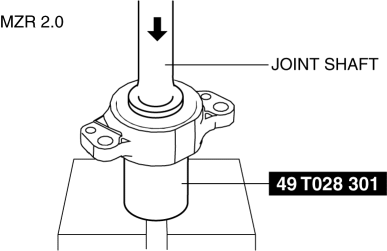
Joint Shaft Assembly Note
1. Press fit the joint shaft using the SST
and a press.
 Drive Shaft Removal/Installation
CAUTION:
Performing the following procedures without first removing the ABS wheel-speed
sensor may possibly cause an open circuit in the wiring harness if it is pulled
by mistake. Before ...
 Joint Shaft Assembly [Mzr 2.3 Disi Turbo]
1. Assemble in the order indicated in the table.
1
Bracket
2
Dust seal (RH)
.
3
Bearing
.
4 ...
Other materials:
Refrigerant Charging
CAUTION:
Do not exceed the specification when charging the system with refrigerant.
Doing so will decrease the efficiency of the air conditioner or damage the refrigeration
cycle parts.
Charging Recycled HFC-134a Refrigerant
1. Connect an HFC-134a recovery/recycling/recharging d ...
Front Wheel Hub Bolt Replacement
1. Remove the brake calliper component and disc plate..
2. Remove the wheel hub bolt using the SST as shown in the figure.
NOTE:
When removing the wheel hub bolts, perform the work between range A shown
in the figure to assure a space for the bolt removal.
3. Place a new whe ...
Auxiliary Jack/Usb Port Inspection
Auxiliary jack inspection
1. Disconnect the negative battery cable..
2. Remove the following parts:
a. Upper panel.
b. Shift lever knob (MTX).
c. Selector lever knob (ATX).
d. Shift panel.
e. Side wall.
f. Console.
g. Auxiliary jack/USB port.
3. Connect a commercially-available pl ...
