Mazda 3 Owners Manual: Replacing Interior Light Bulbs
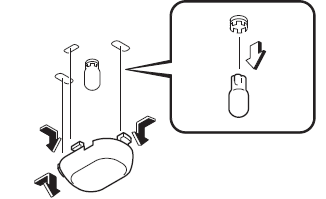
Overhead lights (Front)/Map lights * , Overhead lights (Front) * , Overhead lights (Rear) * , Vanity mirror lights *
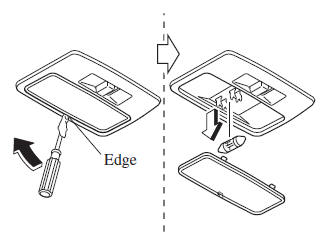
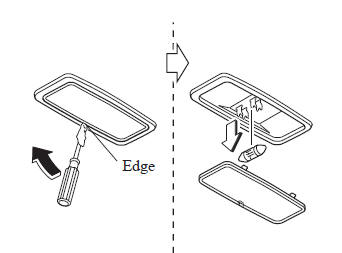
- Wrap a small flathead screwdriver with a soft cloth to prevent damage to the lens, and then remove the lens by carefully prying on the edge of the lens with the flathead screwdriver.
- Disconnect the bulb by pulling it out.
Overhead lights (Front)/Map lights
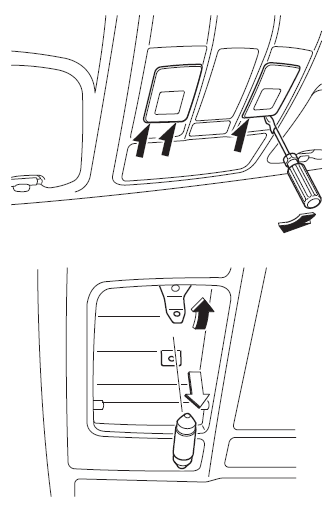
Overhead lights (Front) *
Overhead lights (Rear) *
Vanity mirror lights
- Install the new bulb in the reverse order of the removal procedure
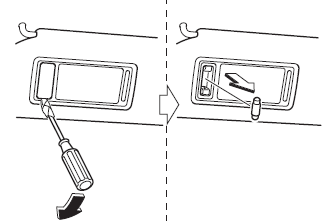
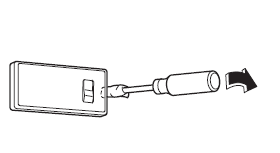
Trunk light (4–Door)
- Press both sides of the lens cap to remove it.
- Disconnect the bulb by pulling it out.
- Install the new bulb in the reverse order of the removal procedure.
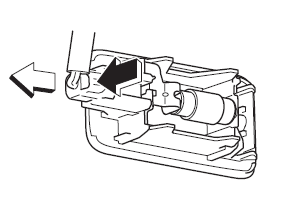
Luggage compartment light (5–Door)
- Wrap a small flathead screwdriver with a soft cloth to prevent damage to the lens and remove the lens by carefully prying on the edge of the lens with the flathead screwdriver.
- Disconnect the connector from the unit by pressing the tab on the connector with your finger and pulling the connector.
- Disconnect the bulb by pulling it out.
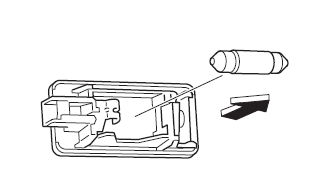
- Install the new bulb in the reverse order of the removal procedure.
 Replacing Exterior Light Bulbs
Headlights (With xenon fusion
headlights)
Low/High beam bulbs
You cannot replace the low/high beam
bulbs by yourself. The bulbs must be
replaced at an Authorized Mazda Dealer.
Headlights (With h ...
 Fuses
Fuses
Your vehicle's electrical system is
protected by fuses.
If any lights, accessories, or controls do
not work, inspect the appropriate circuit
protector. If a fuse has blown, the inside
element w ...
Other materials:
Brake Fluid Pressure Sensor Inspection
1. Switch the ignition to off.
2. Install the SSTs to the master cylinder (secondary side) as shown in
the figure.
NOTE:
When installing the SST (49 D043 0A0) to the master cylinder, use
a commercially available flare nut wrench (flare nut across flat 12 mm {0.47
in}).
...
Electric Vehicle system precautions
When operating or servicing the Subaru Solterra, it is essential
to remain aware of the presence of high-voltage components (nominal voltage approximately
355.2 V), including the traction battery, electricity supply unit, distinctive orange
high-voltage cables, and the electric motor. In addit ...
Seat Belt Extender
If your seat belt is not long enough, even
when fully extended, a seat belt extender
may be available to you at no charge from
your Authorized Mazda Dealer.
This extender will be only for you and for
the particular vehicle and seat. Even if it
plugs into other seat belts, it may not hold
in ...
