Mazda 3 Service Manual: Quarter Window Glass Removal
1. Remove the following parts:
a. Rear seat cushion.
b. Rear scuff plate.
c. Tire house trim.
d. Trunk side upper trim.
e. C-pillar trim.
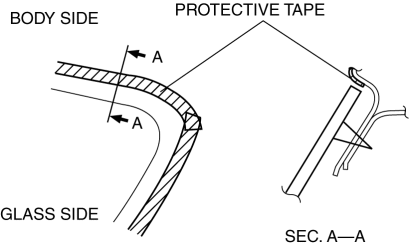
2. Apply protective tape along the edge of the body and the quarter window glass.

NOTE:
-
For the areas of the sealant that are difficult to cut, use the piano wire and follow the procedure under “Reusing Windshield”.
WARNING:
-
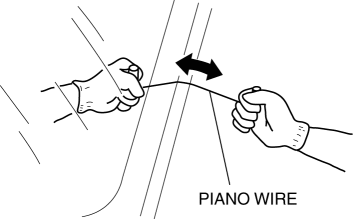
Using the piano wire with bare hands can cause injury. Always wear gloves when using the
piano wire.
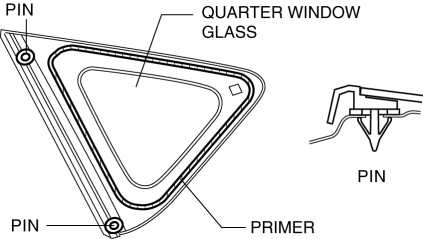
3. Avoiding the pin on the inside of the vehicle, insert the piano wire which has been cut to sufficient length.

4. Wind each end of the piano wire around a bar.
NOTE:
-
Use a long sawing action to spread the work over the whole length of the piano wire to prevent it from breaking due to localized heating.
5. Secure one end of the piano wire, and while pulling the other end, cut the sealant around the quarter window glass.

6. Pull the quarter window glass outward and detach the pins from the body.
7. If a pin or fastener is damaged, remove it.
NOTE:
-
Before removing the pins or spacers from the quarter window glass, place alignment marks on the quarter window glass.
 Quarter Window Glass Installation
WARNING:
Using a razor with bare hands can cause injury. Always wear gloves when using
a razor.
CAUTION:
If a door is opened or closed when all the window glass is closed, the ...
 Rear Door Glass Removal/Installation
1. Fully lower the rear door glass.
2. Disconnect the negative battery cable..
3. Remove the rear door trim..
4. Remove the rear door speaker..
5. Remove the rear power window motor..
6. Rem ...
Other materials:
Operation of Automatic Air
Conditioning
Press the AUTO switch. Selection
of the airflow mode, air intake
selector and amount of airflow will be
automatically controlled.
Use the temperature control dial to
select a desired temperature.
Press the DUAL switch or turn the
front passenger temperature control
dial to control ...
How to use AUX mode (Type A)
Switch the ignition to ACC or ON.
Press the power/volume dial to turn the
audio system on.
Press the media button ( )
of the
audio unit to change to the AUX mode.
NOTE
When the device is not connected to the
auxiliary jack, the mode does not switch
to the AUX mode.
Adj ...
Seat Precautions
WARNINGMake sure the adjustable components of a seat
are locked in place:
Adjustable seats and seatbacks that are not securely locked are
dangerous. In a
sudden stop or collision, the seat or seatback could move, causing
injury. Make sure the
adjustable components of the ...
