Mazda 3 Service Manual: Rain Sensor Removal/Installation
1. Disconnect the negative battery cable..
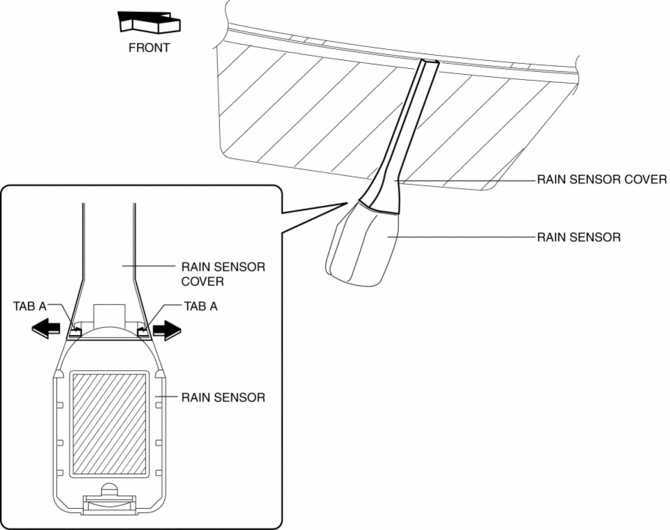
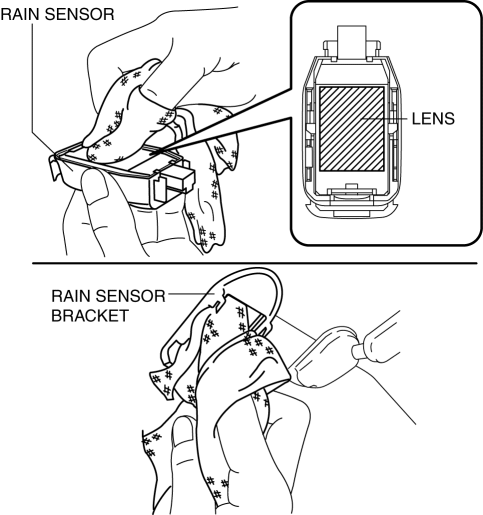
2. Spread open the rain sensor cover in the direction of the arrows and disengage tabs A to remove it.
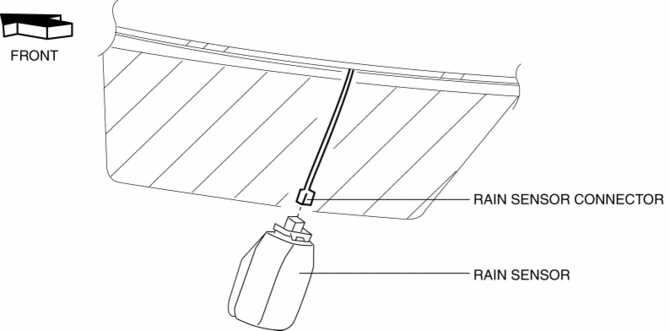
3. Disconnect the rain sensor connector.
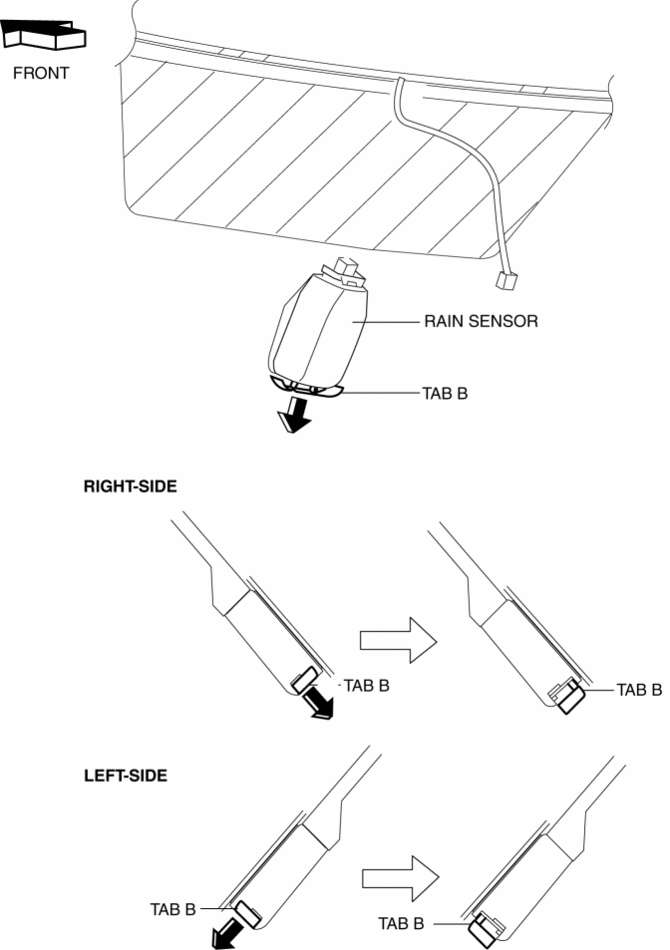
4. Slide rain sensor tab B in the direction of the arrow shown in the figure and detach tab B.
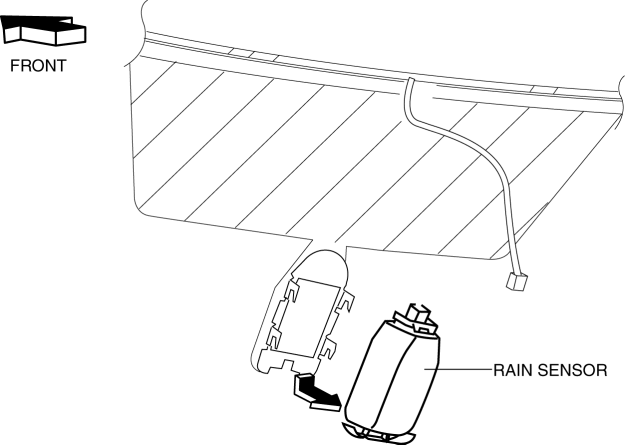
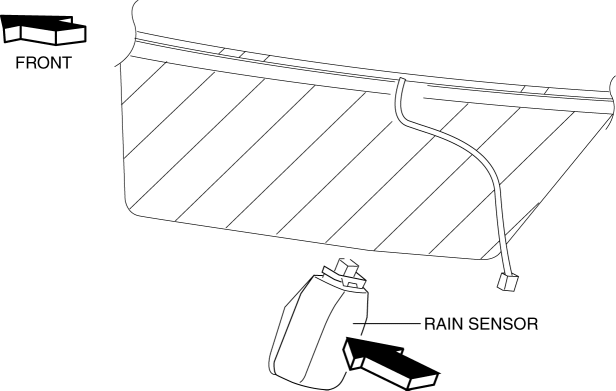
5. Remove the rain sensor in the direction of the arrow shown in the figure.
6. Peel off the rain sensor protective sheet from the rain sensor.

7. Install in the reverse order of removal..
Rain Sensor Installation Note
CAUTION:
-
If the rate at which the rain sensor reflects or transmits infrared light between the rain sensor and the windshield, or through the protective sheet is changed, the rain sensor will determine that there is a malfunction in the rain detection function and stop auto wiper system control. Be careful of the following when installing the rain sensor:
-
Do not reuse rain sensor protective sheet
-
Do not touch rain sensor lens, rain sensor protective sheet, and sensor installation area on windshield with your finger
-
Verify that there is no air bubble after installing rain sensor
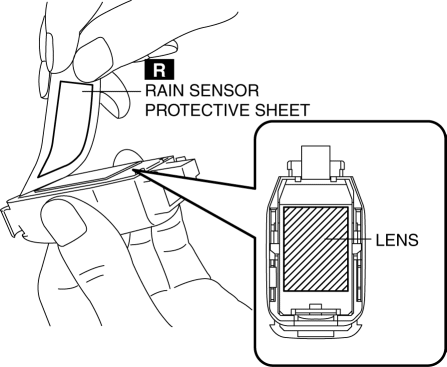
1. Wipe off any oil or dirt from the rain sensor lens and the windshield using a clean rag.
2. Peel off double-sided adhesive tape A from the rain sensor protective sheet.

3. Adhere the rain sensor protective sheet to the rain sensor lens.
4. Peel off double-sided adhesive tape B from the rain sensor protective sheet.
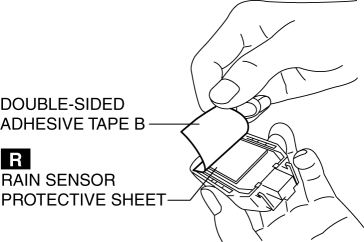
5. Install the rain sensor.
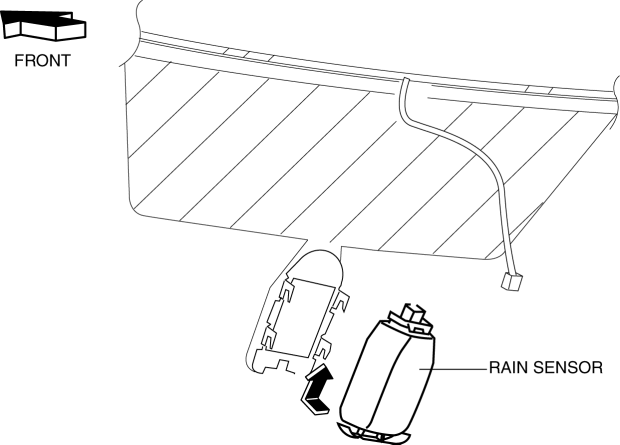
6. Press the rain sensor in the direction of the windshield and press out any air bubbles.
7. Verify that there is no air bubble between the windshield and the rain sensor.
 Windshield Wiper Motor Removal/Installation
1. Disconnect the negative battery cable..
2. Remove the following parts:
a. Windshield wiper arm and blade.
b. Front fender molding.
c. Cowl grille.
d. Center cowl grille No1, No2
3. Stic ...
 Brakes
...
Other materials:
Front Wheel Hub Bolt Replacement
1. Remove the brake calliper component and disc plate..
2. Remove the wheel hub bolt using the SST as shown in the figure.
NOTE:
When removing the wheel hub bolts, perform the work between range A shown
in the figure to assure a space for the bolt removal.
3. Place a new whe ...
Evaporator Temperature Sensor Inspection [Manual Air Conditioner]
NOTE:
Inspect the evaporator temperature sensor when it is installed to the A/C
unit.
1. Set the fan speed MAX HI.
2. Set the temperature control at MAX COLD.
3. Set the RECIRCULATE mode.
4. Turn the A/C switch off.
5. Close all doors and windows.
6. Wait for 5 min.
7. D ...
Front ABS Wheel Speed Sensor Removal/Installation
1. Remove in the order indicated in the table.
2. Install in the reverse order of removal.
3. After installation, verify that there is no twisting in the front ABS wheel-speed
sensor.
1
Connector
2
Front ABS wheel-speed sensor
...
