Mazda 3 Service Manual: Windshield Wiper Motor Removal/Installation
1. Disconnect the negative battery cable..
2. Remove the following parts:
a. Windshield wiper arm and blade.
b. Front fender molding.
c. Cowl grille.
d. Center cowl grille No1, No2
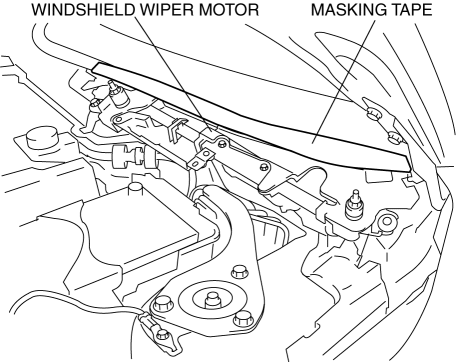
3. Stick masking tape on the figure.
CAUTION:
-
If the front wiper motor is removed without affixing protective tape to the windshield, the motor may contact the windshield and damage it. Always affix protective tape along the edge of the windshield when removing the front wiper motor.
-
Stick masking tape on the position to show in the figure of the windshield.
4. Remove the bolts.
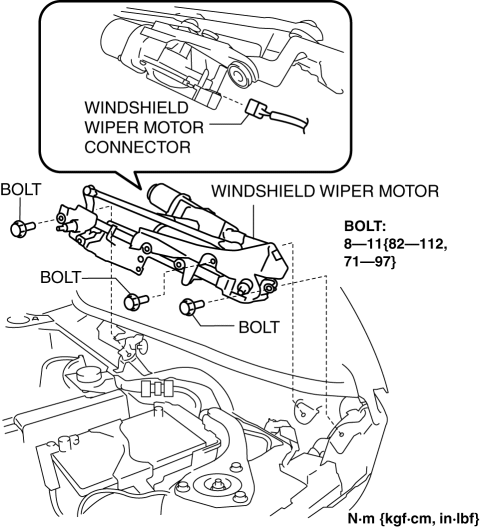
5. Disconnect the windshield wiper motor connector.
6. Remove the windshield wiper motor..
7. Install in the reverse order of removal.
Windshield Wiper Motor Remove Note
1. Slide the windshield wiper motor in the direction of the left front fender and pull it out from between the windshield and the cowl panel.
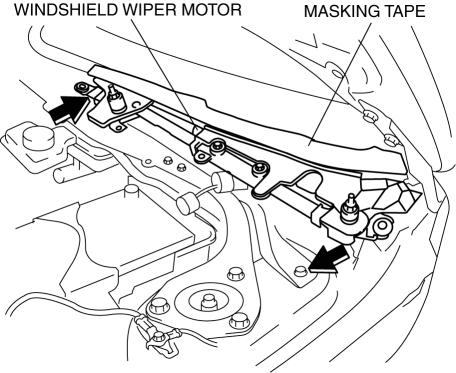
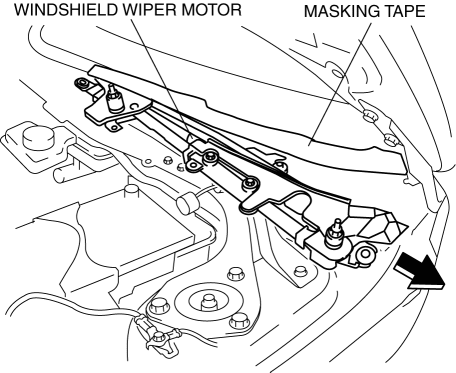
2. Be careful when removing the windshield wiper motor so that it does not strike the windshield. If the windshield wiper motor hits the windshield, it could cause damage to the windshield.
 Windshield Wiper Motor Inspection
1. Disconnect the negative battery cable..
2. Remove the following parts:
a. Windshield wiper arm and blade.
b. Front fender molding.
c. Cowl grille.
d. Center cowl grille No.1, No.2
3. Di ...
 Rain Sensor Removal/Installation
1. Disconnect the negative battery cable..
2. Spread open the rain sensor cover in the direction of the arrows and disengage
tabs A to remove it.
3. Disconnect the rain sensor connector.
...
Other materials:
PKSB (Parking Support Brake)
The Subaru Solterra PKSB (Parking Support Brake) system is engineered
to assist the driver during low-speed maneuvers, such as parking, by issuing warnings
and automatically applying braking force to help reduce potential collision damage
with detected obstacles.
PKSB (Parking Support Brake) ...
Active Driving Display
WARNING
Always adjust the display brightness and position with the vehicle
stopped:
Adjusting the display brightness and position while driving the vehicle
is dangerous as
doing so could distract your attention from the road ahead and lead to
an accident.
...
Rear Upper Arm Removal/Installation
1. When working on the right side of the vehicle, disconnect the canister vent
(CV) solenoid valve from the rear crossmember. (MZR 2.0 (Except Mexico), SKYACTIV-G
2.0, MZR 2.3 DISI Turbo, MZR 2.5 (Except Mexico))
2. Remove in the order indicated in the table.
3. Install in the reverse or ...
