Mazda 3 Service Manual: Antenna Feeder No.1 Removal/Installation
1. Disconnect the negative battery cable..
2. Remove the following parts:
a. Front scuff plate.
b. Front side trim.
c. Upper panel.
d. Shift lever knob (MTX).
e. Selector lever knob (ATX).
f. Shift panel.
g. Side wall.
h. Console.
i. Shift lever component (MTX).
j. Selector lever component (ATX).
k. Dashboard under cover.
l. Glove compartment.
m. Hood release lever.
n. Lower panel.
o. Center panel.
p. Audio unit.
q. Climate control unit.
r. A-pillar trim (RH).
3. Partially peel back the hook.

4. Partially peel back the SIRIUS satellite radio antenna feeder.
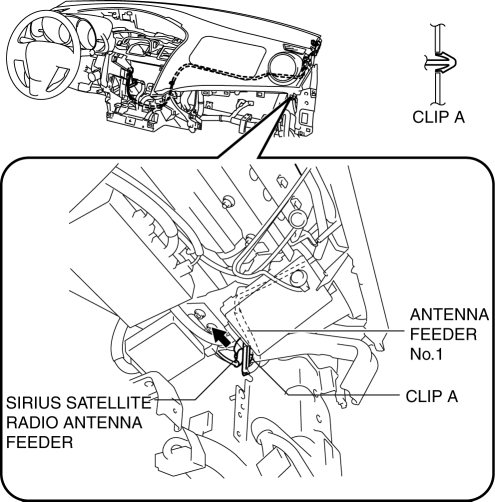
5. Remove the clip A.
6. Peel off the tape.
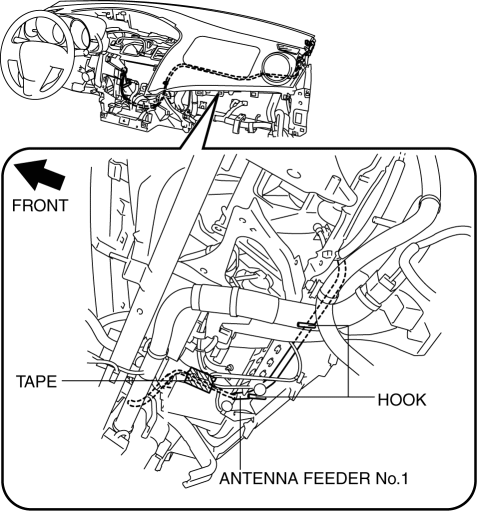
7. Partially peel back the hook.
8. Remove the clips B.
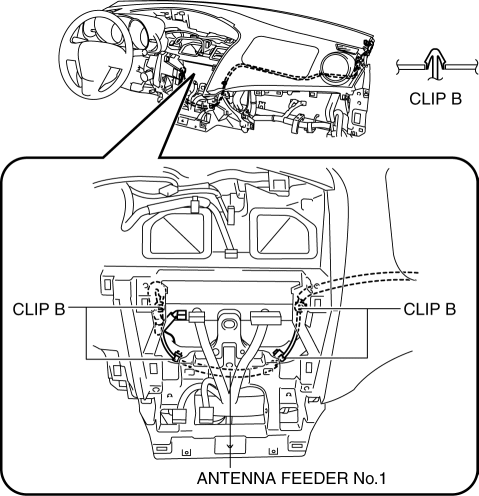
9. Remove the antenna feeder No.1.
10. Install in the reverse order of removal.
 Antenna Feeder No.1 Inspection
1. Disconnect the negative battery cable..
2. Remove the following parts:
a. Center panel.
b. Audio unit.
c. A-pillar trim (RH).
3. Disconnect antenna feeder No.2.
4. Verify that the c ...
 Antenna Feeder No.2 Inspection
1. Disconnect the negative battery cable..
2. Remove the following parts:
a. A-pillar trim (RH).
b. Rear seat cushion (4SD).
c. Rear scuff plate (RH).
d. Tire house trim (RH).
e. Trunk sid ...
Other materials:
No.27 Fuel Refill Concerns [Mzr 2.0, Mzr 2.5]
27
FUEL REFILL CONCERNS
DESCRIPTION
Fuel tank does not fill smoothly.
POSSIBLE CAUSE
PCM DTC is stored
Nonreturn valve malfunction
Improper use of fuel ...
Wastegate Actuator Inspection [Mzr 2.3 Disi Turbo]
1. Remove the air hose and air duct..
2. Disconnect the hose from the wastegate actuator.
3. Plug the wastegate actuator as shown in the figure.
4. Connect the vacuum pump to the port
5. Raise the pressure slowly and take a measurement of the pressure when the
rod stroke is 1.5 mm {0.0 ...
Refrigerant Pressure Sensor Inspection [Manual Air Conditioner]
MZR 2.0, MZR 2.5
1. Install the manifold gauge.
2. Verify the high-pressure side reading of the manifold gauge.
3. Measure the terminal voltage of the climate control unit.
1G,1H and 2J
4. Verify that below graph as measure the terminal voltage 2J.
5. Follow the climate control ...
