
Subaru Solterra 2023-2026 Owner's Manual: Reading this manual
Explains symbols used in this manual
Symbols in this manual
 WARNING:
In the Subaru Solterra Owner’s Manual, this symbol highlights critical information that must be followed without exception. Ignoring such instructions may result in severe injury or even loss of life. Always pay close attention to these warnings when operating or servicing your Subaru Solterra to ensure maximum safety.
 NOTICE:
This symbol in the Subaru Solterra manual identifies important precautions related to vehicle care. Failure to follow these instructions may lead to damage, reduced performance, or malfunction of your Subaru Solterra systems and components.
 Indicates operating or working procedures.
All procedures for the Subaru Solterra should be followed in the exact numerical order provided to ensure proper and safe operation of the vehicle systems.
Symbols in illustrations
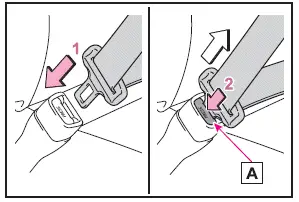
 Indicates
the specific action (such as pushing, pulling, or turning) required to operate switches,
buttons, and controls within your Subaru Solterra.
Indicates
the specific action (such as pushing, pulling, or turning) required to operate switches,
buttons, and controls within your Subaru Solterra.
 Indicates the expected result of an operation (for example, a lid opening or a system
activating) in your Subaru Solterra.
Indicates the expected result of an operation (for example, a lid opening or a system
activating) in your Subaru Solterra.
 Indicates
the exact component, system, or location within the Subaru Solterra that is being
described.
Indicates
the exact component, system, or location within the Subaru Solterra that is being
described.
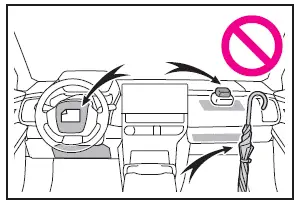
 Means
Do not perform the described action, avoid improper use, and ensure that unsafe
situations are prevented when handling your Subaru Solterra.
Means
Do not perform the described action, avoid improper use, and ensure that unsafe
situations are prevented when handling your Subaru Solterra.
 For your information
Main Owner's Manual
This comprehensive Owner’s Manual for the Subaru Solterra has been carefully
designed to cover the full range of models, trims, and available equipment, including
optional f ...
 Pictorial index
■ Exterior
Side doors
Locking/unlocking
Opening/closing the side windows
Locking/unlocking by using the mechanical key
Warning messages related to Subaru Solterra door systems
Ba ...
Other materials:
Operation of Automatic Air
Conditioning
Press the AUTO switch. Selection
of the airflow mode, air intake
selector and amount of airflow will be
automatically controlled.
Use the temperature control dial to
select a desired temperature.
Press the DUAL switch or turn the
front passenger temperature control
dial to control ...
Liftgate Upper Trim Removal/Installation
1. Detach tab while pulling the liftgate upper trim in the direction of the arrow
(1) shown in the figure, then detach clips and pin while pulling in the direction
of the arrow (2).
2. Detach tab while pulling the liftgate upper trim in the direction of the arrow
(3) shown in the figure, ...
Oil Pressure Switch Inspection [FS5 A EL]
CAUTION:
Water or foreign objects entering the connector can cause a poor connection
or corrosion. Be sure not to drop water or foreign objects on the connector
when disconnecting it.
On-Vehicle Inspection
1. Perform the following procedures.
a. Remove the aerodynamic under co ...
