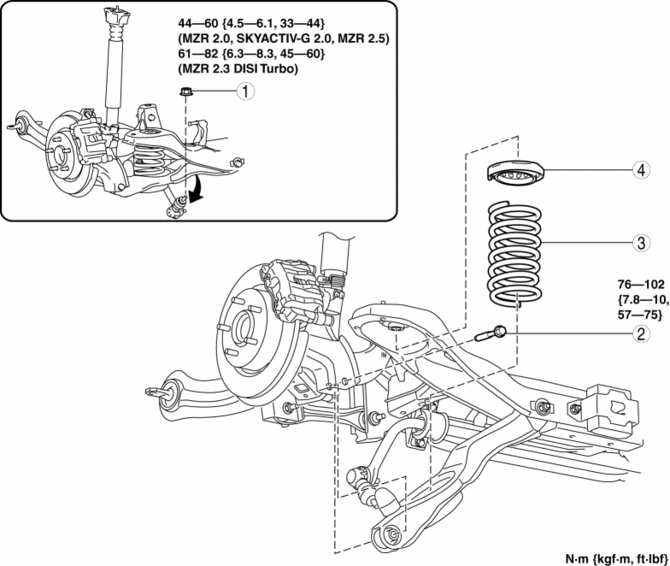
Mazda 3 Service Manual: Rear Coil Spring Removal/Installation
1. Disconnect the auto leveling sensor lower side. (Vehicles with AFS).
2. Remove in the order indicated in the table.
3. Install in the reverse order of removal.
4. Inspect the wheel alignment and adjust it if necessary..
|
1 |
Rear stabilizer control link upper nut |
|
2 |
Rear lower arm outer bolt . |
|
3 |
Rear coil spring . |
|
4 |
Upper spring seat rubber |
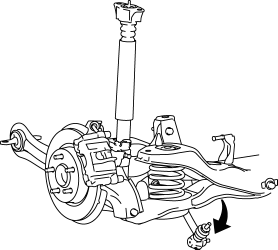
Rear Lower Arm Outer Bolt Removal Note
1. Rotate the rear stabilizer component downwards as shown in the figure.
2. Support the rear lower arm using a jack.
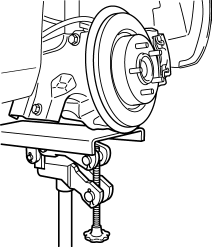
3. Loosen the rear lower arm inner bolt.
4. Remove the rear lower arm outer bolt.
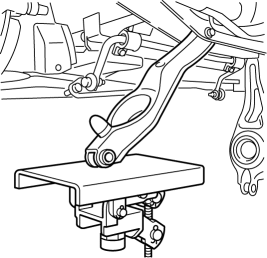
Rear Coil Spring Installation Note
1. Position the jack under the rear lower arm and jack up slowly.
WARNING:
-
Installing the coil spring is dangerous. The coil spring could fly off and cause serious injure or death, and damage the vehicle.
2. Align the upper end of the rear coil spring with the step of the upper spring seat rubber.
3. Align the lower end of the rear coil spring with the step of the lower spring seat rubber.
4. Install the lower arm outer bolt.
 Rear Suspension
...
 Rear Lateral Link Removal/Installation
1. Remove in the order indicated in the table.
2. Install in the reverse order of removal.
3. Inspect the wheel alignment and adjust it if necessary..
1
Rear stabiliz ...
Other materials:
Heated Oxygen Sensor (HO2 S) Removal/Installation [Mzr 2.0, Mzr 2.5]
WARNING:
A hot engine and exhaust system can cause severe burns. Turn off the engine
and wait until they are cool before removing the exhaust system.
1. Remove the battery cover..
2. Disconnect the negative battery cable..
3. Disconnect the HO2S connector.
4. Remove the HO2S u ...
Seat Weight Sensor Calibration [Two Step Deployment Control System]
CAUTION:
If any of the following work is performed, perform the seat weight sensor
calibration using the M-MDS.
Replacement with a new seat weight sensor
Replacement with a new seat weight sensor control module
Replacement with new passenger-side seat pa ...
Rear ABS Wheel Speed Sensor Inspection
Installation Visual Inspection
1. Inspect for the following:
If there is any malfunction, replace the part.
a. Excessive looseness or play of the rear ABS wheel-speed sensor
b. Deformation of the rear ABS wheel-speed sensor
c. Deformation or damage of the rear ABS sensor rotor
C ...
