Mazda 3 Service Manual: Rear Oil Seal Replacement [Mzr 2.0, Mzr 2.5]
1. Remove the transaxle..
2. Remove the flywheel (MTX) or the drive plate (ATX)..
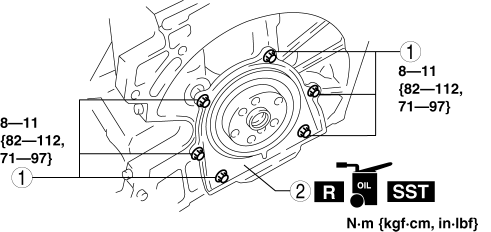
3. Remove in the order indicated in the table.
4. Install in the reverse order of removal.
|
1 |
Bolt |
|
2 |
Rear oil seal (See Rear Oil Seal Installation Note.) |
Rear Oil Seal Installation Note
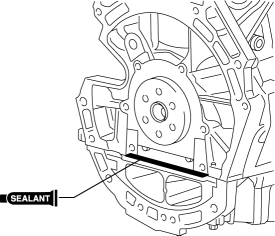
1. Apply silicone sealant to the mating faces as shown in the figure.
CAUTION:
-
Install the rear oil seal before the applied silicone sealant starts to harden.
-
Thickness
-
2.2—3.2 mm {0.09—0.12 in}
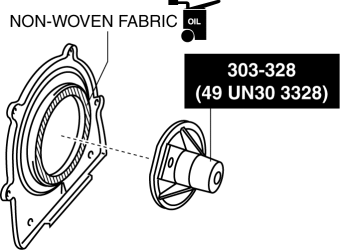
2. Apply clean engine oil to the new oil seal lip.
3. Install the SST
to the non-woven fabric side of the rear oil seal.
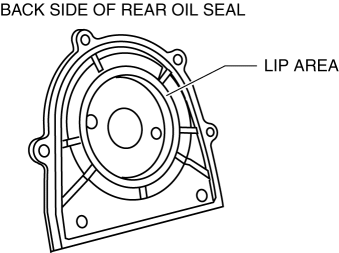
4. From the back side of the rear oil seal, verify that there is no damage or separation in the lip area of the rear oil seal.
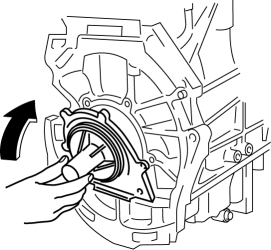
5. Install the rear oil seal to the engine as shown in the figure.
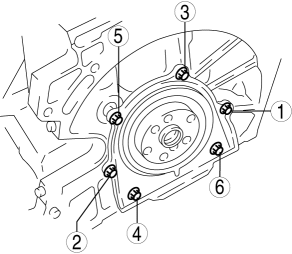
6. Tighten the rear oil seal bolts in the order as shown in the figure.
-
Tightening torque
-
8—11 N·m {82—112 kgf·cm, 71—97 in·lbf}
 Oil Seal Replacement [FS5 A EL]
1. Remove the aerodynamic under cover No. 2..
2. Remove the oil seal.
a. Drain the ATF..
b. Remove the drive shaft and/or joint shaft..
CAUTION:
The oil seal is easily damaged by the s ...
 Transaxle Oil Inspection [A26 M R]
1. Park the vehicle on level ground.
2. Remove the aerodynamic under cover No.2..
3. Remove the oil level plug and gasket.
4. Verify that the oil is near the brim of the plug port.
I ...
Other materials:
Tire rotation
To maintain balanced performance and ensure even wear across all wheels, rotate
the tires of your Subaru Solterra according to the recommended pattern illustrated
below.
Regular tire rotation on the Subaru Solterra helps extend overall tire lifespan,
improve handling stability, and maintain o ...
Fan Switch Inspection [Manual Air Conditioner]
1. Disconnect the negative battery cable..
2. Remove the following parts:
a. Upper panel.
b. Shift lever knob (MTX).
c. Selector lever knob (ATX).
d. Shift panel.
e. Side wall.
f. Console.
g. Front scuff plate.
h. Front side trim.
i. Dashboard under cover.
j. Glove compartment. ...
Front Seat Belt Removal/Installation [Two Step Deployment Control System]
WARNING:
Handling the front seat belt (pre-tensioner seat belt) improperly can accidentally
deploy the pre-tensioner seat belt, which may seriously injure you. Read the
air bag system service warnings and cautions before handling the front seat
belt..
WARNING:
The side ...
