Mazda 3 Service Manual: Rear Power Window Regulator Removal/Installation
1. Fully lower the rear door glass.
2. Disconnect the negative battery cable..
3. Remove the rear door trim..
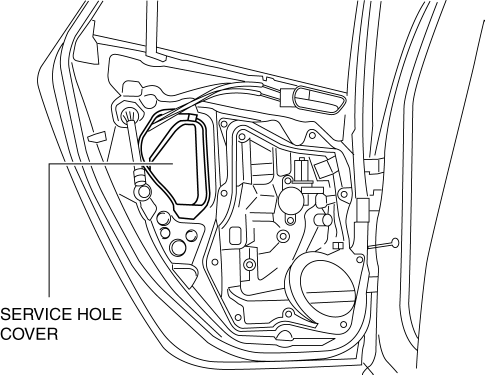
4. Remove the service hole cover.
5. Remove the rear door speaker..
6. Remove the glass guide..
7. Remove the rear power window motor..
8. Remove the rear door glass..
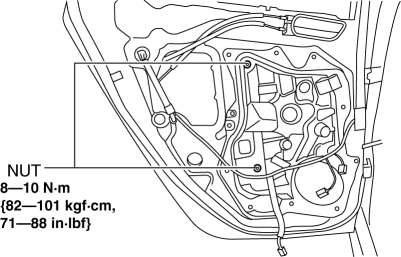
9. Remove the nuts.
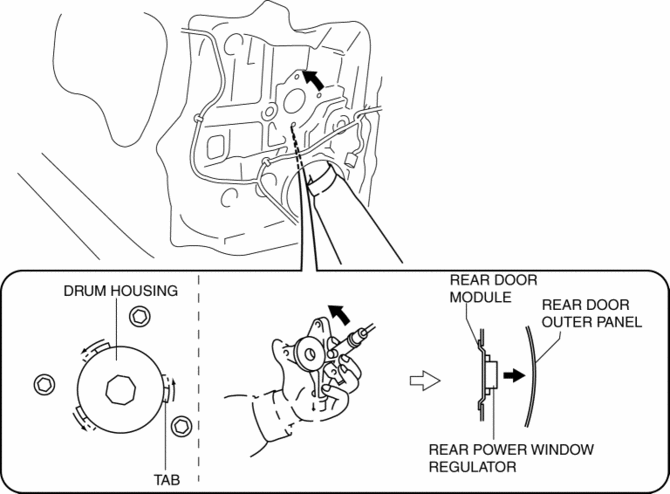
10. Insert a hand through the speaker installation hole, rotate the drum housing in the direction shown in the figure to detach the tabs from the rear door module.
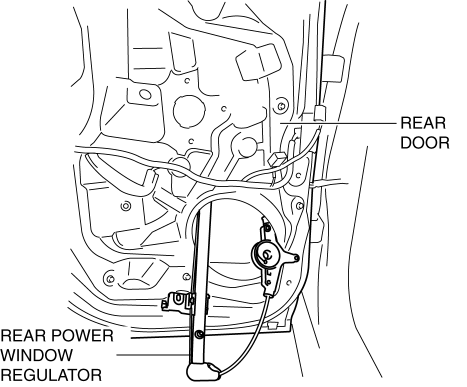
11. Remove the rear power window regulator through the speaker installation hole.
12. Install in the reverse order of removal.
CAUTION:
-
Make sure the cable does not unspool from the drum housing when installing.
 Rear Door Quarter Glass Removal/Installation
1. Fully lower the rear door glass.
2. Disconnect the negative battery cable..
3. Remove the rear door trim..
4. Remove the service hole cover.
5. Remove the hole plug.
6. Remove the ...
 Rear Window Glass Installation
WARNING:
Using a utility knife with bare hands can cause injury. Always wear gloves
when using a utility knife.
CAUTION:
Proper installation of the glass may be difficult if s ...
Other materials:
Air Filter Removal/Installation
1. Disconnect the negative battery cable..
2. Remove the side wall..
3. Disconnect the evaporator temperature sensor connector.
4. Disconnect the power MOS FET connector. (Full-auto air conditioner)
5. Disconnect the resistor connector. (Manual air conditioner)
6. Remove in the order indic ...
Front Side Marker/Front Turn Light Bulb Removal/Installation
1. Disconnect the negative battery cable..
2. Slightly bend back the front mudguard..
3. Rotate the front side marker/front turn light socket in the direction of the
arrow shown in the figure.
4. Remove the front side marker/front turn light bulb.
5. Install in the reverse order of ...
Call Interrupt
A call can be interrupted to receive an
incoming call from a third party.
When is selected or the pickup
button on the steering wheel is pressed,
the current call is held and the system
switches to the new incoming call.
When is selected, the current
call is ended and the system switche ...
