Mazda 3 Service Manual: Rear Washer Nozzle Removal/Installation
1. Disconnect the negative battery cable..
2. Remove the following parts:
a. Liftgate upper trim.
b. Rear spoiler.
c. High-mount brake light.
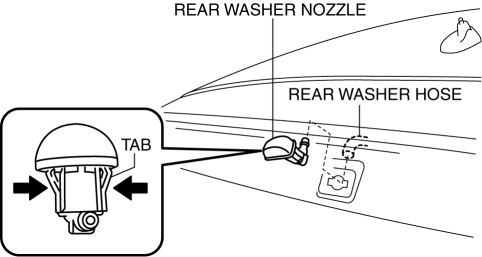
3. Disconnect the rear washer hose.
4. Press the tabs and remove the rear washer nozzle.
5. Install in the reverse order of removal.
6. Adjust the rear washer nozzle..
 Rear Washer Nozzle Adjustment
1. Insert a needle or an equivalent tool into the spray hole of the rear washer
nozzle and adjust the nozzle direction as shown.
...
 Washer Motor Inspection
1. Disconnect the negative battery cable..
2. Remove the front mudguard (RH)..
3. Disconnect the washer motor connector.
4. After connecting washer motor terminal A to the positive battery termi ...
Other materials:
Climate Control Unit Removal/Installation [Full Auto Air Conditioner]
1. Disconnect the negative battery cable..
2. Remove the following parts:
a. Upper panel.
b. Shift lever knob (MTX).
c. Selector lever knob (ATX).
d. Shift panel.
e. Side wall.
f. Console.
g. Center panel.
h. Audio unit.
3. Remove in the order indicated in the table.
...
Driver monitor
Basic functions
In the Subaru Solterra, the driver monitoring system continuously observes the
driver during operation using an advanced in-cabin camera. It analyzes the driver’s
head position, gaze direction, and whether the eyes are open or closed.
Based on this data, the Subaru Solterra e ...
Seat Warmer
The front seats are electrically heated. The
ignition must be switched ON.
Press the seat warmer switch to illuminate
the indicator light while the ignition
is switched ON. The mode changes as
follows each time the seat warmer switch
is pressed.
WARNING
Be careful when using t ...
