Mazda 3 Service Manual: Starter Interlock Switch Inspection [Mzr 2.0, Mzr 2.5]
CAUTION:
-
Do not reuse the starter interlock switch if it is removed from the vehicle even once. Replace with a new starter interlock switch when installing.
1. Remove the battery cover..
2. Disconnect the negative battery cable..
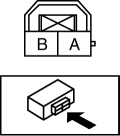
3. Disconnect the starter interlock switch connector.
4. Verify that the continuity is as indicated in the table using a tester.


-
If the continuity is not as indicated in the table, replace the starter interlock switch.
.
 Starter Inspection [Mzr 2.0, Mzr 2.5]
On-vehicle Inspection
1. Verify that the battery is fully charged.
2. The starter is normal if it rotates smoothly and without any noise when the
engine is cranked.
If the starter does no ...
 Starter Interlock Switch Removal/Installation [C66 M R]
1. Remove the battery cover..
2. Disconnect the negative battery cable..
3. Disconnect the starter interlock switch connector.
4. Remove the starter interlock switch from the pedal bracket.
...
Other materials:
Driver Side Air Bag Module Removal/Installation [Two Step Deployment Control
System]
WARNING:
Handling the air bag module improperly can accidentally deploy the air bag
module, which may seriously injure you. Read the air bag system service warnings
and cautions before handling the air bag module..
Due to the adoption of 2-step deployment control in the driver- ...
Hill Launch Assist (HLA)
Hill Launch Assist (HLA) is a function
which assists the driver in accelerating
from a stop while on a slope. When
the driver releases the brake pedal and
depresses the accelerator pedal while
on a slope, the function prevents the
vehicle from rolling. The braking force is
maintained automati ...
M Position Switch Inspection [FS5 A EL]
1. Perform the following procedures.
a. Remove the battery cover..
b. Disconnect the negative battery cable.
c. Remove the console..
d. Disconnect the selector lever component connector.
2. Inspect the continuity between the selector lever component terminals A and
H.
If ...
