Mazda 3 Service Manual: Trunk Lid Key Cylinder Removal/Installation
1. Disconnect the negative battery cable..
2. Remove the trunk lid trim..
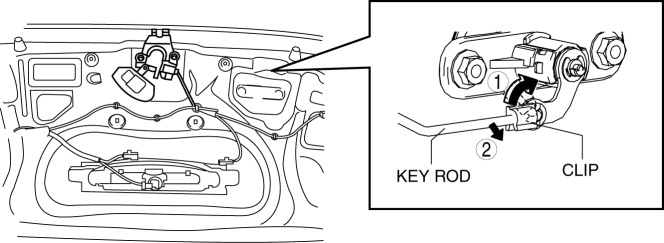
3. Lift the clip in the direction of the arrow (1), and pull out the key rod in the direction of the arrow (2).
4. Remove the nuts.
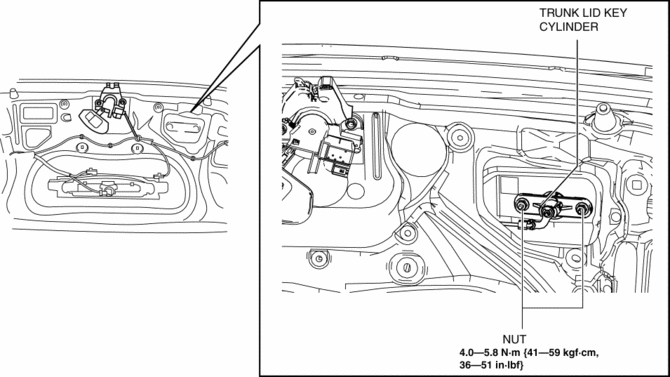
5. Remove the trunk lid key cylinder.
6. Install in the reverse order of removal.
 Trunk Lid Adjustment
1. Measure the gap and height difference between the trunk lid and the body.
Standard clearance
a: 2.4—4.4 mm {0.10—0.17 in}
b: -4.6—-2.6 mm {-0.18—-0.11 in}
c: ...
 Trunk Lid Latch And Release Actuator Inspection
1. The following actuator and switch are integrated with the release actuator.
Inspect the trunk lid latch and release actuator according to each inspection procedure
for the following items.
...
Other materials:
Locking, Unlocking
Locking, Unlocking with
Transmitter
All doors and the liftgate can be locked/ unlocked by operating the keyless
entry system transmitter, refer to Keyless Entry System .
Locking, Unlocking with Door-
Lock Switch
All doors and the liftgate lock
automatically when the lock side is
pressed. Th ...
When Liftgate/Trunk Lid Cannot be Opened
If the vehicle battery is dead or there is a
malfunction in the electrical system and
the liftgate/trunk lid cannot be opened,
perform the following procedure as an
emergency measure to open it:
(5–door)
Remove the cap on the interior
surface of the liftgate with a flathead
screwdrive ...
Starter Interlock Switch Inspection [Mzr 2.3 Disi Turbo]
CAUTION:
Do not reuse the starter interlock switch if it is removed from the vehicle
even once. Replace with a new starter interlock switch when installing.
1. Remove the battery cover..
2. Disconnect the negative battery cable..
3. Disconnect the starter interlock switch connec ...
