Mazda 3 Service Manual: Trunk Lid Opener Lever Removal/Installation
1. Remove the front scuff plate (LH)..
2. Remove the front side trim (LH)..
3. Remove the fuel-filler lid opener bezel..
4. Partially peel back the floor covering.

5. Remove the bolts.
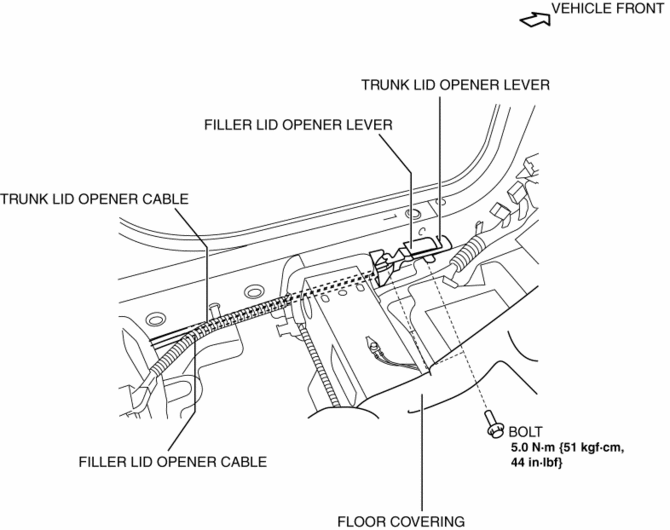
6. Disconnect the cable and trunk lid opener lever.
7. Install in the reverse order of removal.
 Trunk Lid Opener Cable Removal/Installation
1. Disconnect the negative battery cable..
2. Remove the following parts:
a. Front seat (LH)(See FRONT SEAT REMOVAL/INSTALLATION.)
b. Front scuff plate (LH).
c. Rear scuff plate.
d. B-pillar ...
 Trunk Lid Release Actuator Inspection
1. Disconnect the negative battery cable..
2. Remove the trunk lid trim..
3. Remove the trunk lid latch and release actuator..
4. Press the latch in using a flathead screwdriver to inspect the l ...
Other materials:
Oil Pressure Switch Removal
MZR 2.0, MZR 2.5, MZR 2.3 DISI Turbo
WARNING:
A hot engine can cause severe burns. Turn off the engine and wait until it
is cool before removing the exhaust system.
1. Disconnect the negative battery cable.
2. Remove the aerodynamic under cover No.2..
3. Disconnect the connecto ...
Towing Description
We recommend that towing be done only
by an Authorized Mazda Dealer or a
commercial tow-truck service.
Proper lifting and towing are necessary
to prevent damage to the vehicle.
Government and local laws must be
followed.
A towed vehicle usually should have its
drive wheels (front wheel ...
If a warning light turns on or a warning buzzer sounds
If any warning indicator illuminates or a buzzer is activated in
your Subaru Solterra, remain calm and take appropriate action. A warning light that
briefly turns on and then goes off does not always indicate a malfunction. However,
if the issue repeats or persists, it is recommended to have t ...
