
Mazda 3 Service Manual: Up Switch Inspection [FS5 A EL]
1. Perform the following procedures.
a. Remove the battery cover..
b. Disconnect the negative battery cable.
c. Remove the console..
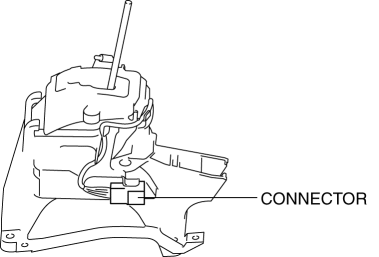
d. Disconnect the selector lever component connector.
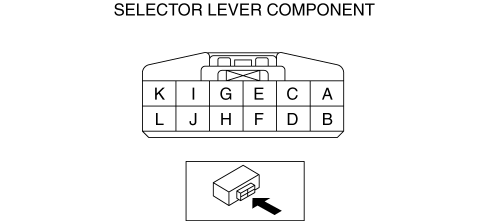
2. Inspect the continuity between the selector lever component terminals B and H.
-
If there is any malfunction, replace the selector lever component..
|
Test condition |
Continuity |
|
Selector lever is in the M position (+) side position |
Continuity |
|
Selector lever is not in the M position (+) side position |
No continuity |
 Transmission/Transaxle SST
1: Mazda SST number
2: Global SST number
Example
1:49 UN30 3009
2:303-009
Crankshaft damper remover
Clutch [G35M-R]
1:49 E011 1A0
2: ...
 Up Switch Inspection [Fw6 A EL]
Continuity Inspection
NOTE:
The up switch is built into the selector lever component.
1. Remove the battery cover..
2. Disconnect the negative battery cable..
3. Remove the console. ...
Other materials:
Drive Belt Removal/Installation [Mzr 2.3 Disi Turbo]
1. Remove the aerodynamic under cover No.2 and splash shield as a single unit..
2. Rotate the drive belt auto tensioner in the direction shown in the figure
and remove the drive belt.
3. Install the drive belt.
4. Verify that the drive belt auto tensioner indicator mark does not exceed ...
Oil Pressure Switch Removal/Installation [FS5 A EL]
WARNING:
A hot transaxle and ATF can cause severe burns. Turn off the engine and wait
until they are cool.
1. Perform the following procedures.
a. Remove the battery cover..
b. Disconnect the negative battery cable.
c. Remove the aerodynamic under cover NO.2..
2. Remove in t ...
Electric Power Steering Oil Pump Component Disassembly/Assembly
CAUTION:
The internal parts of the EHPAS control module and motor could be damaged
if they receive an impact. Be careful when handling the EHPAS control module
and motor to prevent the component from getting hit. Replace the electric power
steering oil pump component if it has recei ...
