Mazda 3 Service Manual: Front Door Glass Removal/Installation
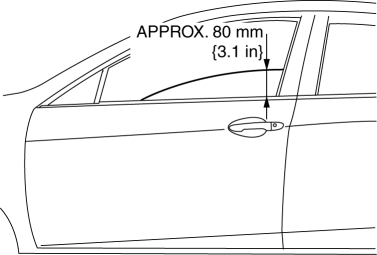
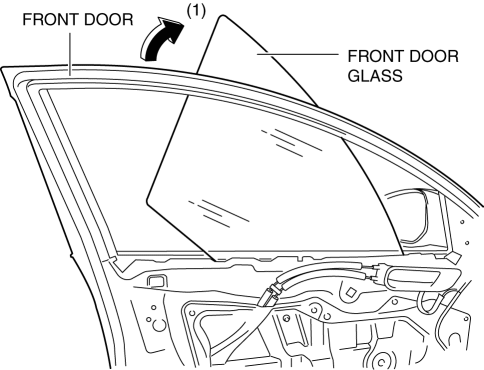
1. To access the glass installation bolt, position the front door glass so that the distance from the top of the front door glass to the upper part of the front beltline molding is approx. 80 mm {3.1 in}
.
2. Disconnect the negative battery cable..
3. Remove the inner garnish..
4. Remove the front door trim..
5. Remove the front door speaker..
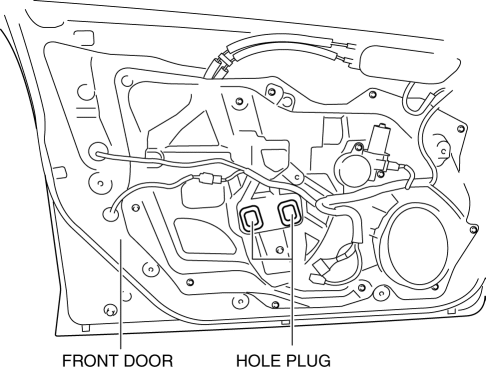
6. Remove the hole plug.
7. Remove the bolts.
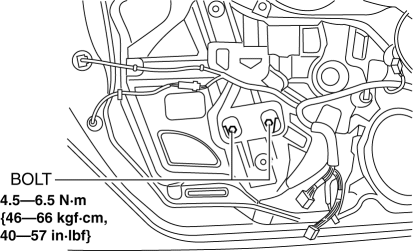
CAUTION:
-
If the bolts are removed without supporting the front door glass, the front door glass may fall off and be damaged. Remove the bolts while inserting your hand into the front door speaker installation hole to support the front door glass.
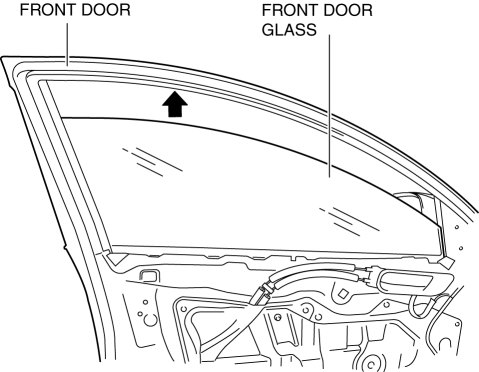
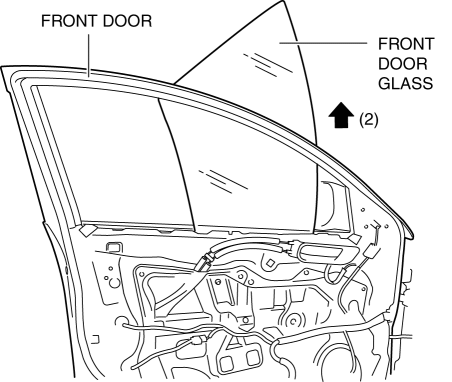
8. Lift up the front door glass, tilt it in the direction of arrow (1) shown in the figure, then remove it in the direction of arrow (2).
9. Install in the reverse order of removal.
CAUTION:
-
If the bolts are installed without supporting the front door glass, the front door glass may fall off and be damaged. When installing the front door glass, align the glass edge with the front door glass guide by hand through the speaker installation hole, and then install the bolts.
 Filament Repair
1. Clean the filament using isopropyl alcohol.
2. Attach tape to both sides of the filament.
3. Using a small brush or marking pen, apply silver paint.
4. After 2—3 min, carefully remove t ...
 Front Power Window Regulator Removal/Installation
1. To access the glass installation bolt, position the front door glass so that
the distance from the top of the front door glass to the upper part of the front
beltline molding is approx. 80 mm { ...
Other materials:
Storage Compartments
WARNING
Keep storage boxes closed when
driving:
Driving with the storage boxes open is
dangerous. To reduce the possibility of
injury in an accident or a sudden stop,
keep the storage boxes closed when
driving.
Do not put articles in storage spaces
with no lid:
...
Liftgate Latch Switch Inspection
1. Disconnect the negative battery cable..
2. Remove the following parts:
a. Liftgate upper trim.
b. Liftgate side trim.
c. Liftgate lower trim.
d. Liftgate latch and lock actuator.
3. Press the latch in using a flathead screwdriver to inspect the latch lever
condition.
4. Verify ...
Automatic Transaxle Controls
Various Lockouts:
Indicates that you must depress
the brake pedal and hold in the lock-release
button to shift (The ignition must be switched ON).
Indicates the shift lever can be
shifted freely into any position.
Indicates that you must hold in
the lock-release button to shift.
NO ...
