Mazda 3 Service Manual: Front Door Module Panel Removal/Installation
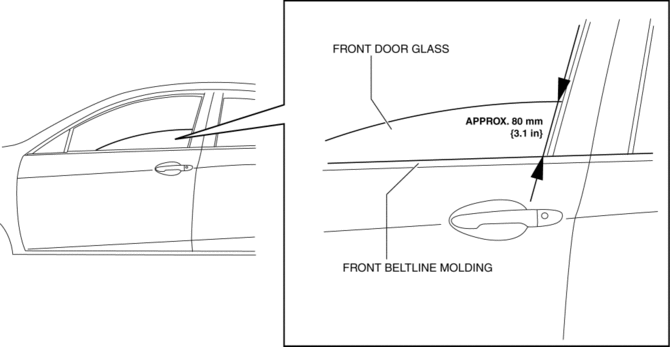
1. To access the glass installation bolt, position the front door glass so that the distance from the top of the front door glass to the upper part of the front beltline molding is approx. 80 mm {3.1 in}
.
2. Disconnect the negative battery cable..
3. Remove the following parts:
a. Inner garnish.
b. Front door trim.
c. Front door speaker.
d. Front door glass.
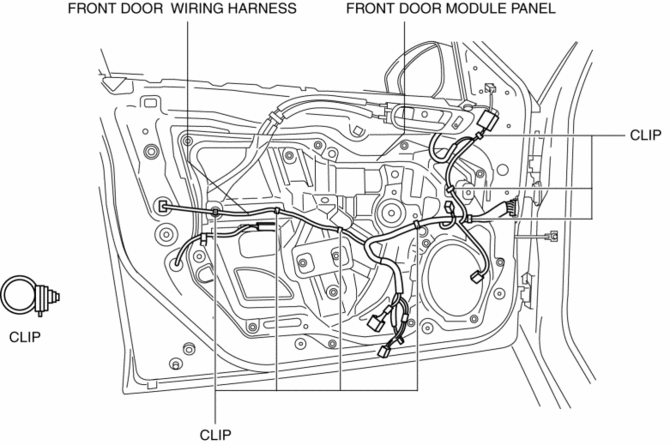
4. Disconnect the front door wiring harness connector.
5. Remove the clips securing the front door wiring harness from the front door module panel.
CAUTION:
-
If the front door wiring harness is placed on the floor after removing the front door wiring harness from the front door module panel, it could be damaged by the front door closing or stepped on while moving. Connect the connector shown in the figure after removing the front door wiring harness and do not place the front door wiring harness on the floor.
6. Remove the bolts.
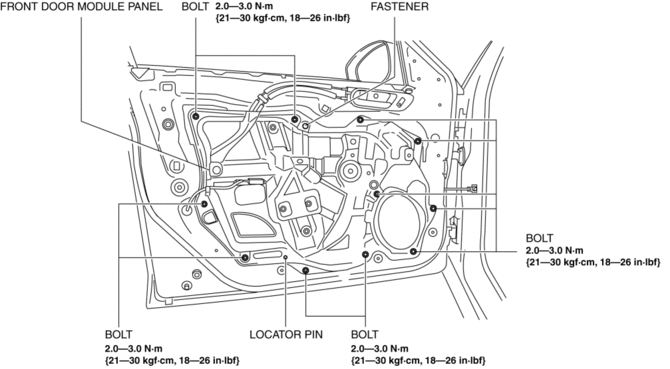
7. Remove the fastener.
8. Remove the front door module panel.
9. Remove the front power window motor..
10. Remove the front power window regulator..
11. Install in the reverse order of removal.
 Front Door Latch Switch Inspection
1. To access the glass installation bolt, position the front door glass so that
the distance from the top of the front door glass to the upper part of the front
beltline molding is approx. 80 mm { ...
 Front Door Removal/Installation
WARNING:
Removing the front door without supporting it could cause the front door
to fall and cause serious injury. Always perform the procedure with at least
another person to prevent t ...
Other materials:
Selecting the Airflow Mode
Dashboard Vents
Defroster and Floor Vents
Dashboard and Floor Vents
Defroster Vents
Floor Vents
...
Stay Damper Disposal
NOTE:
The stay damper contains colorless, odorless, nontoxic gas.
1. Wear protective eye wear.
2. Position the stay damper horizontally.
3. Drain gas and oil by cutting the position indicated in the figure to a
2—3 mm {0.08—0.11 in} depth using a metal saw.
CAUTION:
...
General Procedures (Suspension)
Wheel and Tire Installation
1. When installing the wheels and tires, tighten the wheel nuts in a criss-cross
pattern to the following tightening torque.
Tightening torque
88—118 N·m {9.0—12 kgf·m, 65—87 ft·lbf}
Suspension Links Removal/Installation
1. For the joint ...
