Mazda 3 Service Manual: Joint Shaft Disassembly [Mzr 2.0, Mzr 2.5]
1. Disassemble in the order indicated in the table.
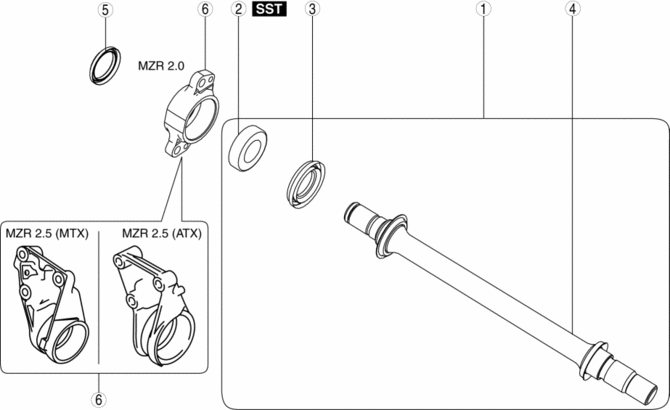
|
1 |
Joint shaft component . |
|
2 |
Bearing . |
|
3 |
Dust seal (LH) |
|
4 |
Joint shaft |
|
5 |
Dust seal (RH) |
|
6 |
Bracket |
Joint Shaft Component Disassembly Note
1. Secure the bracket to the vise at the position shown in the figure and remove the joint shaft component using the plastic hammer.
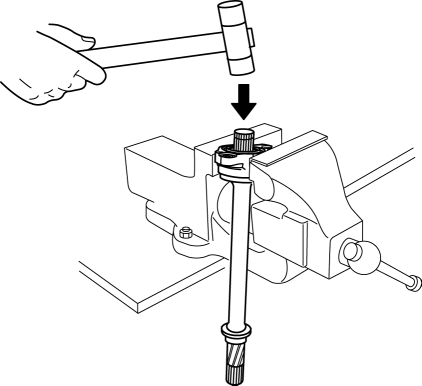
CAUTION:
-
Do not drop the joint shaft because it could be damaged.
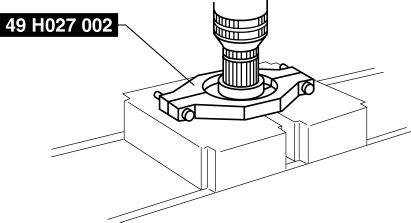
Bearing Disassembly Note
1. Set the SST
and joint shaft to the press.
 Joint Shaft Assembly [Skyactiv G 2.0]
1. Assemble in the order indicated in the table.
1
Dust cover
.
2
Bearing
.
3
Snap ring
4
...
 Joint Shaft Disassembly [Mzr 2.3 Disi Turbo]
1. Disassemble in the order indicated in the table.
1
Joint shaft component
.
2
Bearing
.
3
Dust seal (LH)
...
Other materials:
Column Cover Removal/Installation
1. Pull down the steering wheel.
2. Pull the upper column cover in the direction of the arrow in the order of
(1) and (2), then remove the upper column cover while detaching the hooks and pins.
3. Pull up the steering wheel.
4. Remove the ignition key illumination..
5. Remove the scre ...
Variable Swirl Shutter Valve Switch Inspection [Mzr 2.3 Disi Turbo]
Voltage Inspection
NOTE:
The variable swirl shutter valve switch cannot be removed as a single unit.
When replacing the variable swirl shutter valve switch, replace it together
with the intake manifold as a single unit.
1. Switch the ignition to ON (Engine off).
2. Verify that ...
Air Filter Removal/Installation [Mzr 2.3 Disi Turbo]
1. Remove the fuel-filler pipe protector..
2. Remove in the order indicated in the table.
1
Evaporative hose
2
Air filter
3. Install in the reverse order of removal. ...
