Mazda 3 Service Manual: Car Navigation Unit Removal/Installation
With Audio Unit (Without Display)
NOTE:
-
Car-navigation unit is integrated with the multi information display.
1. Refer to MULTI INFORMATION DISPLAY REMOVAL/INSTALLATION.
With Audio Unit (With Display)
1. Disconnect the negative battery cable..
2. Remove the following parts:
a. Upper panel.
b. Shift knob (MTX).
c. Selector lever knob (ATX).
d. Shift panel.
e. Side wall.
f. Console.
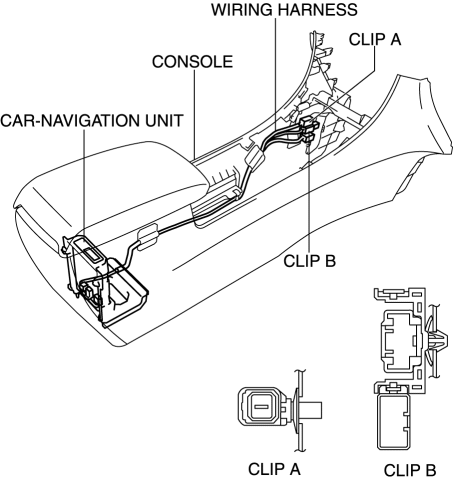
3. Remove clips A and B.
4. Remove the clip C.
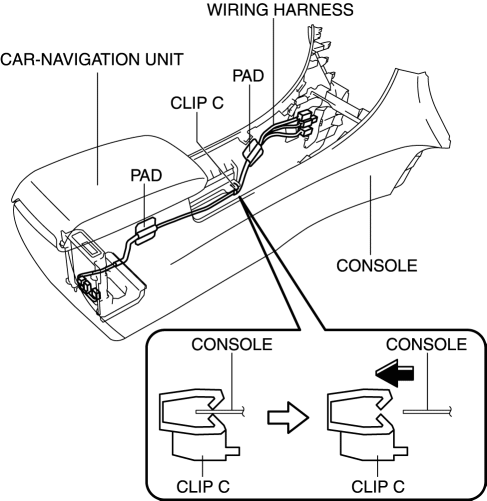
5. Remove the pad.
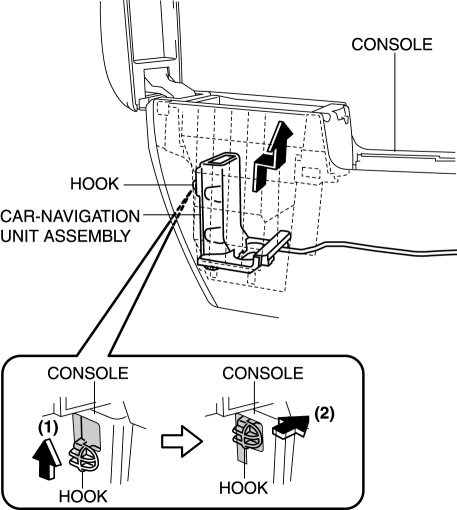
6. While pressing the clip tabs in the direction of arrow (1) shown in the figure, press the clip in the direction of arrow (2) to detach the tab of clip D from the console.

7. Remove the clip D.
8. Move the car-navigation unit assembly in the direction of arrows (1) and (2) shown in the figure and remove the hook.
9. Remove the car-navigation unit assembly.
10. Remove the wiring harness from the bracket hook.
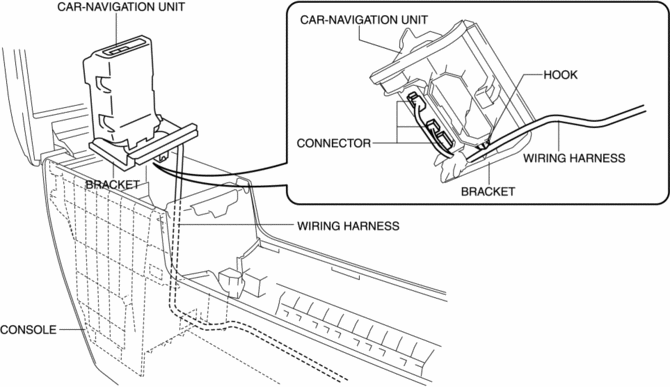
11. Disconnect the connector.
12. Pull the wiring harness from the console.
13. Remove the screws.
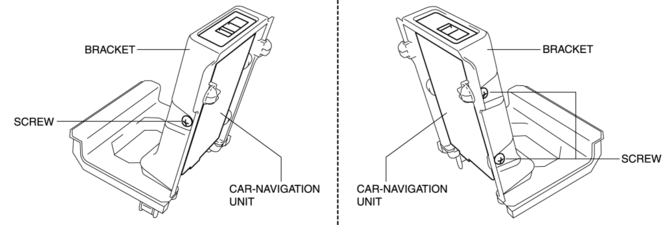
14. Remove the car-navigation unit from the bracket.
15. Install in the reverse order of removal.
 Car Navigation Unit
Purpose
Reads the SD card data inserted into the car-navigation unit and sends the
read data to the audio unit.
Function
The car-navigation unit has the following functions:
...
 Global Positioning System (Gps) Antenna Removal/Installation
With Audio Unit (Without Display)
1. Disconnect the negative battery cable..
2. Remove the following parts:
a. Upper column cover.
b. Instrument cluster.
3. Remove in the order indicated in t ...
Other materials:
Discharge Headlight Service Warnings
Discharge Headlight Service Warnings
To prevent electrical shock when replacing the discharge headlight bulb,
always perform the servicing with dry hands and in an area where it does not
get wet.
Never probe the discharge headlight bulb connector directly with a finger
o ...
Air Fuel Ratio (A/F) Sensor Removal/Installation [Mzr 2.0, Mzr 2.5]
WARNING:
A hot engine and exhaust system can cause severe burns. Turn off the engine
and wait until they are cool before removing the exhaust system.
1. Remove the battery cover..
2. Disconnect the negative battery cable..
3. Remove the plug hole plate..
4. Remove the air clea ...
Seat Weight Sensor Calibration [Two Step Deployment Control System]
CAUTION:
If any of the following work is performed, perform the seat weight sensor
calibration using the M-MDS.
Replacement with a new seat weight sensor
Replacement with a new seat weight sensor control module
Replacement with new passenger-side seat pa ...
