Mazda 3 Service Manual: Climate Control Unit Removal/Installation [Manual Air Conditioner]
1. Disconnect the negative battery cable..
2. Remove the following parts:
a. Upper panel.
b. Shift lever knob (MTX).
c. Selector lever knob (ATX).
d. Shift panel.
e. Side wall.
f. Console.
g. Front scuff plate.
h. Front side trim.
i. Dashboard under cover.
j. Glove compartment.
k. Hood release lever.
l. Lower panel.
m. Center panel.
n. Audio unit.
o. Shower duct (driver-side).
3. Remove in the order indicated in the table.
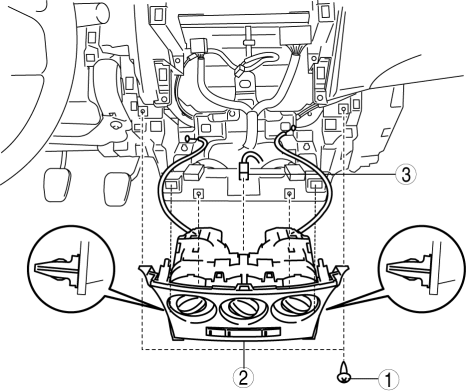
|
1 |
Screw |
|
2 |
Climate control unit (See Climate Control Unit Removal Note.) (See Climate Control Unit Installation Note.) |
|
3 |
Connector |
4. Install in the reverse order of removal.
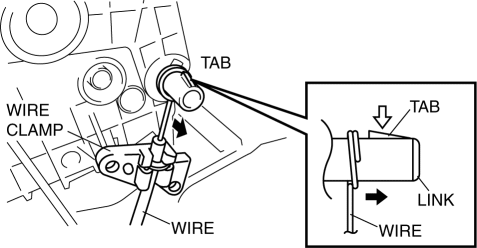
Climate Control Unit Removal Note
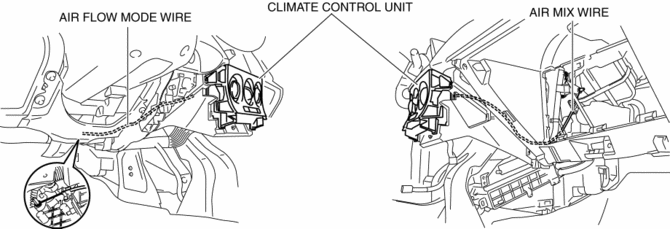
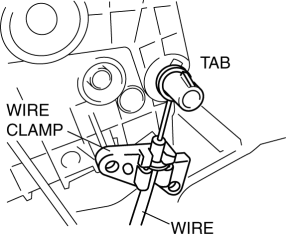
1. Disconnect each wire to links and remove it to the wire clamps.
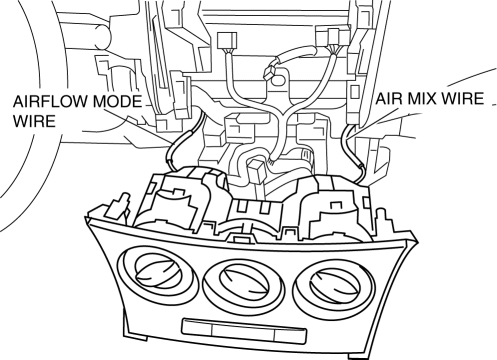
2. Pull out the air mix wire and airflow mode wire from the dashboard.
Climate Control Unit Installation Note
1. Pass each wire through the hole on the dashboard as shown in the figure.
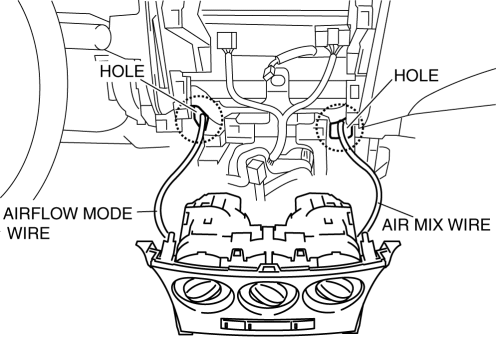
2. Route each wire as shown in the figure.
3. Connect the climate control unit connector.
4. Connect each wire to links and install it to the wire clamps.
5. Verify that the dial is turned fully from one end to the other.
 Climate Control Unit Removal/Installation [Full Auto Air Conditioner]
1. Disconnect the negative battery cable..
2. Remove the following parts:
a. Upper panel.
b. Shift lever knob (MTX).
c. Selector lever knob (ATX).
d. Shift panel.
e. Side wall.
f. Consol ...
 Condenser Inspection
1. Inspect the condenser for cracks, damage, and oil leakage.
If there is any malfunction, replace the condenser.
2. Visually inspect the fins for clogging of foreign material.
I ...
Other materials:
Brake Assist
During emergency braking situations
when it is necessary to depress the brake
pedal with greater force, the brake assist
system provides braking assistance, thus
enhancing braking performance.
When the brake pedal is depressed hard or
depressed more quickly, the brakes apply
more firmly.
N ...
Checking and replacing fuses
If any electrical system in your Subaru Solterra stops functioning,
it may be caused by a blown fuse. In such cases, inspect the fuse and replace it
if necessary to restore proper operation.
Checking and replacing fuses
1. Switch the power OFF in your Subaru Solterra completely before starting ...
Engine Disassembly/Assembly [Mzr 2.3 Disi Turbo]
1. Remove the engine from the transaxle..
2. Remove the intake-air system..
3. Remove the exhaust system..
4. Remove the generator..
5. Remove the EGR valve..
6. Remove the ignition coils..
7. Remove the high pressure fuel pump and high pressure fuel pump cover..
8. Remove the fuel inj ...
