Mazda 3 Service Manual: Cruise Control Switch Inspection [Mzr 2.0, Mzr 2.5]
1. Remove the battery cover..
2. Disconnect the negative battery cable and wait for 1 min or more
..
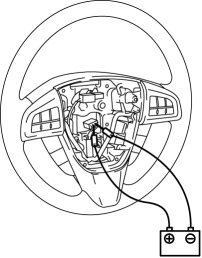
3. Remove the driver–side air bag module..
4. Disconnect the clock spring connector (part wiring harness-side).
5. Measure the resistance between clock spring terminals K and M (part wiring harness-side) using a tester.
-
If not as specified, replace the steering switch..
|
Switch condition |
Resistance (ohm) |
|
Cruise OFF switch held at on |
Continuity |
|
CANCEL switch held at on |
Approx. 120 |
|
SET (-) switch held at on |
Approx. 300 |
|
SET (+) switch held at on |
Approx. 600 |
|
RESUME switch held at on |
Approx. 1,110 |
|
Cruise ON switch held at on |
Approx. 2,110 |
|
Neutral |
Approx. 4,310 |
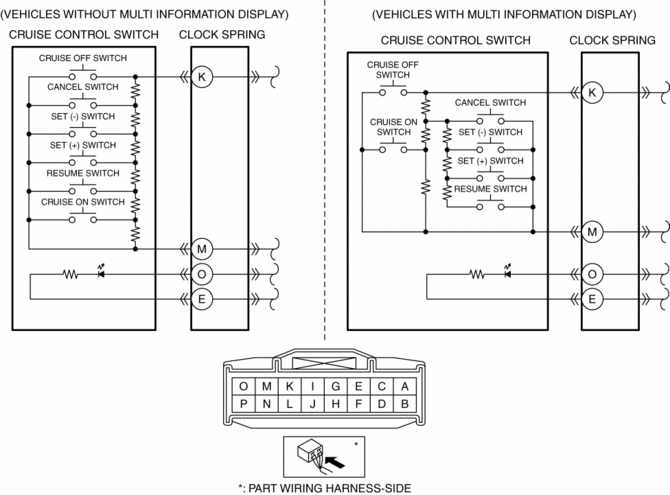
6. Apply battery positive voltage to clock spring connector terminal O (part wiring harness-side), and terminal E (part wiring harness-side) to ground.
7. Verify that the LED illuminates.
-
If the LED does not illuminate, replace the steering switch..
 Cruise Control
...
 Cruise Control Switch Inspection [Mzr 2.3 Disi Turbo]
1. Remove the battery cover..
2. Disconnect the negative battery cable and wait for 1 min or more..
3. Remove the driver–side air bag module..
4. Disconnect the clock spring connector (part w ...
Other materials:
Charging equipment
Charging equipment and names
AC charging inlet
Charging indicator and charging inlet light
DC charging inlet
Charging port lid
AC charging cable (if equipped)*
Charging port
*: For safe handling procedures and precautions related to the AC charging cable,
always refer to the ...
ABS HU/CM Inspection
1. Disconnect the ABS HU/CM connector..
2. Connect the negative battery cable..
3. Attach the tester lead to the ABS HU/CM wiring harness-side connector and
inspect the voltage, continuity, or resistance according to the standard (reference
value) in the table below.
Standard (reference)
...
AHB (Automatic High Beam)
The Automatic High Beam system in the Subaru Solterra utilizes a
forward-facing camera mounted near the upper windshield area to continuously monitor
surrounding light conditions. By analyzing headlights of oncoming vehicles, taillights
ahead, street lighting, and ambient brightness, the Subar ...
