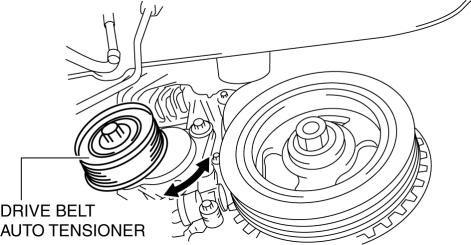
Mazda 3 Service Manual: Drive Belt Auto Tensioner Inspection [Mzr 2.3 Disi Turbo]
1. Remove the aerodynamic under cover No.2 and splash shield as a single unit..
2. Remove the drive belt..
3. Verify that the drive belt auto tensioner moves smoothly in the operational direction.
-
Replace the drive belt auto tensioner if necessary..
4. Rotate the drive belt auto tensioner pulley by hand and verify that it rotates smoothly.
-
Replace the drive belt auto tensioner if necessary..
5. Install the drive belt..
6. Install the aerodynamic under cover No.2 and splash shield as a single unit..
 Drive Belt Auto Tensioner Inspection [Mzr 2.0, Mzr 2.5]
MZR 2.0
1. Remove the generator drive belt with the A/C drive belt still installed and
set it out of the way..
2. Verify that the drive belt auto tensioner moves smoothly in the operational
dir ...
 Drive Belt Auto Tensioner Inspection [Skyactiv G 2.0]
WARNING:
A hot engine can cause severe burns. Turn off the engine and wait until it
is cool before servicing.
CAUTION:
If the rubber part of the drive belt auto tensioner is d ...
Other materials:
Rear Door Checker Removal/Installation
1. Fully close the rear door glass.
2. Disconnect the negative battery cable..
3. Remove the rear door trim..
4. Remove the rear door speaker..
5. Remove the bolt A.
6. Remove the bolts B.
7. Pull out the rear door checker from the rear door speaker installation hole.
8. Insta ...
Making a Call
Phonebook Usage
Telephone calls can be made by saying
the name of a person (voice tag) whose
phone number has been registered in
Bluetooth ® Hands-Free in advance. Refer
to Phonebook registration.
Press the pick-up button or talk button
with a short press.
Say: [Beep] “Call”
Prom ...
Tire House Trim Removal/Installation
4SD
1. Remove the rear seat cushion..
2. Remove the rear scuff plate..
3. Partially peel back the seaming welt.
4. Remove the fastener.
5. Pull the tire house trim in the direction of arrow shown in the figure while
remove the clip A, pin B and C.
6. Pull the tire house trim in the ...
