Mazda 3 Service Manual: Rear Speaker Inspection
4SD
1. Disconnect the negative battery cable..
2. Remove the following parts:
a. Rear seat cushion.
b. Rear scuff plate.
c. Tire house trim.
d. C-pillar trim.
e. Rear package trim.
f. Rear speaker.
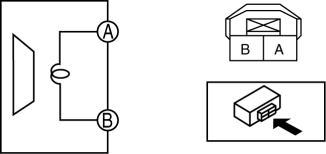
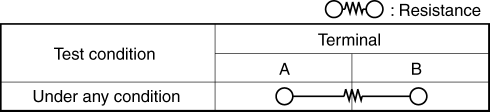
3. Verify the resistance between the rear speaker terminals.
-
If not within the specification, replace the rear speaker.
-
Resistance
-
3.24—3.96 ohms
5HB
1. Disconnect the negative battery cable..
2. Remove the following parts:
a. Rear scuff plate.
b. Tire house trim.
c. Trunk side upper trim.
d. Trunk side trim.
e. C-pillar trim.
f. Rear speaker.
3. Verify the resistance between the rear speaker terminals.
-
If not within the specification, replace the rear speaker.
-
Resistance
-
3.24—3.96 ohms
 Rear Door Speaker Removal/Installation
1. Disconnect the negative battery cable..
2. Remove the rear door trim..
3. Disconnect the connector.
Without Bose®
With Bose®
4. Remove the screw.
5. Remove the rear door speaker ...
 Rear Speaker Removal/Installation
4SD
1. Disconnect the negative battery cable..
2. Remove the following parts:
a. Rear seat cushion.
b. Rear scuff plate.
c. Tire house trim.
d. C-pillar trim.
e. Rear package trim.
3. R ...
Other materials:
Power/Volume/Sound Controls
Power ON/OFF
Switch the ignition to ACC or ON. Press
the power/volume dial to turn the audio
system on. Press the power/volume dial
again to turn the audio system off.
Volume adjustment
To adjust the volume, turn the power/
volume dial. Turn the power/volume
dial clockwise to increase vo ...
Precaution [ABS]
1. Any one or a combination of the ABS warning and brake system warning lights
illuminates even when the system is normal.
Warning lights that may illuminate and/or flash
Cases in which the light may illuminate
Conditions in which the light will go ou ...
Accessory Socket Removal/Installation
Front
1. Disconnect the negative battery cable..
2. Remove the upper panel..
3. Remove the shift lever knob. (MTX).
4. Remove the selector lever knob. (ATX).
5. Remove the shift panel.
6. Remove in the order indicated in the table.
1
Socket
(See Socket Rem ...
