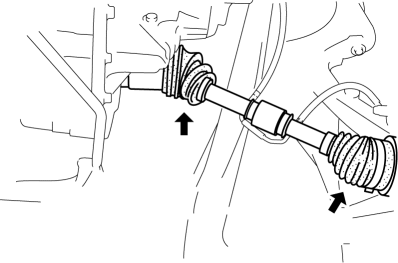
Mazda 3 Service Manual: Drive Shaft Inspection
1. Inspect the connections for any looseness.

-
If there is any malfunction, tighten or replace the applicable part.
2. Inspect the dust boot for damage and cracks.
-
If there is any malfunction, replace the applicable part.
3. Move the spline and joint up and down, left and right by hand and verify that there is no excessive play.
-
If there is any malfunction, replace the applicable part.
 Drive Shaft (Tripod Joint) Disassembly/Assembly
1. Disassemble in the order indicated in the table.
2. Assemble in the reverse order of disassembly.
1
Boot band (transaxle side)
(See Boot Band (Transaxle Side) Dis ...
 Drive Shaft Removal/Installation
CAUTION:
Performing the following procedures without first removing the ABS wheel-speed
sensor may possibly cause an open circuit in the wiring harness if it is pulled
by mistake. Before ...
Other materials:
Rear Window Glass Removal
4SD
1. Disconnect the negative battery cable.
2. Remove the following parts:
a. Rear seat cushion.
b. Rear scuff plate.
c. Rear side seat back.
d. C–pillar trims.
e. Rear package trim.
f. Tire house trims.
3. Remove the fasteners.
4. Set the headliner out of the way.
5. Disc ...
Oil Cooler Removal/Installation [Mzr 2.0, Mzr 2.5]
WARNING:
Hot engines and engine oil can cause severe burns. Turn off the engine and
wait until it and the engine oil have cooled.
A vehicle that is lifted but not securely supported on safety stands is dangerous.
It can slip or fall, causing death or serious injury. Never work ...
Starter Interlock Switch Inspection [Mzr 2.0, Mzr 2.5]
CAUTION:
Do not reuse the starter interlock switch if it is removed from the vehicle
even once. Replace with a new starter interlock switch when installing.
1. Remove the battery cover..
2. Disconnect the negative battery cable..
3. Disconnect the starter interlock switch connec ...
