Mazda 3 Service Manual: Front Beltline Molding Removal/Installation
1. Fully open the front door glass.
2. Disconnect the negative battery cable..
3. Remove the inner garnish..
4. Remove the front door trim..
5. Remove the power outer mirror..
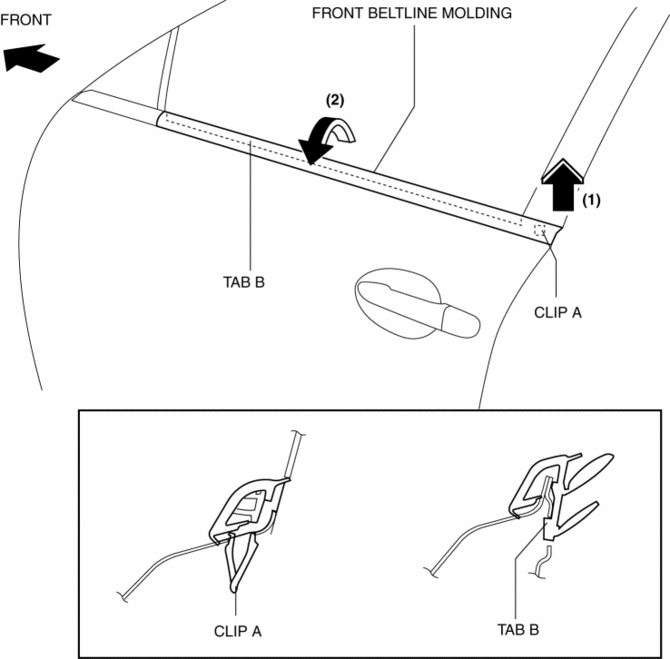
6. Remove clip A using a fastener remover and pull the front beltline molding in the direction of the arrow (1) shown in the figure.
7. Rotate the front beltline molding in the direction of the arrow (2) shown in the figure and remove it while detaching tab B.
8. Install in the reverse order of removal.
 Floor Under Cover Removal/Installation
1. Lift up the vehicle.
2. Remove the cap nuts.
3. Remove the nus.
4. Pull the floor under covers in the direction of arrow (1), (2), (3) shown
in the figure, and then remove it.
5. ...
 Front Bumper Disassembly/Assembly
Standard Type
Except SKYACTIV-G 2.0
1. Disassemble in the order indicated in the table.
1
Screw A
2
Guard cover
3
...
Other materials:
Washer Motor Inspection
1. Disconnect the negative battery cable..
2. Remove the front mudguard (RH)..
3. Disconnect the washer motor connector.
4. After connecting washer motor terminal A to the positive battery terminal,
and terminal B to the negative battery terminal, verify that washer fluid flows
to the wind ...
Automatic Transaxle Fluid (ATF) Replacement [FS5 A EL]
WARNING:
A hot transaxle and ATF can cause severe burns. Turn off the engine and wait
until they are cool before changing the ATF.
1. Drain the ATF.
a. Remove the oil dipstick.
b. Remove the aerodynamic under cover NO.2..
c. Remove the drain plug and washer to drain the ATF in ...
Starter Interlock Switch Inspection [Mzr 2.0, Mzr 2.5]
CAUTION:
Do not reuse the starter interlock switch if it is removed from the vehicle
even once. Replace with a new starter interlock switch when installing.
1. Remove the battery cover..
2. Disconnect the negative battery cable..
3. Disconnect the starter interlock switch connec ...
