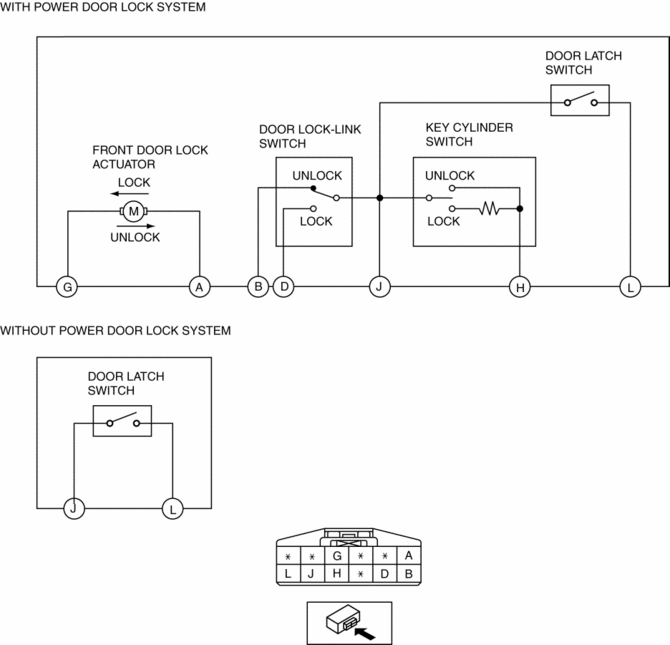
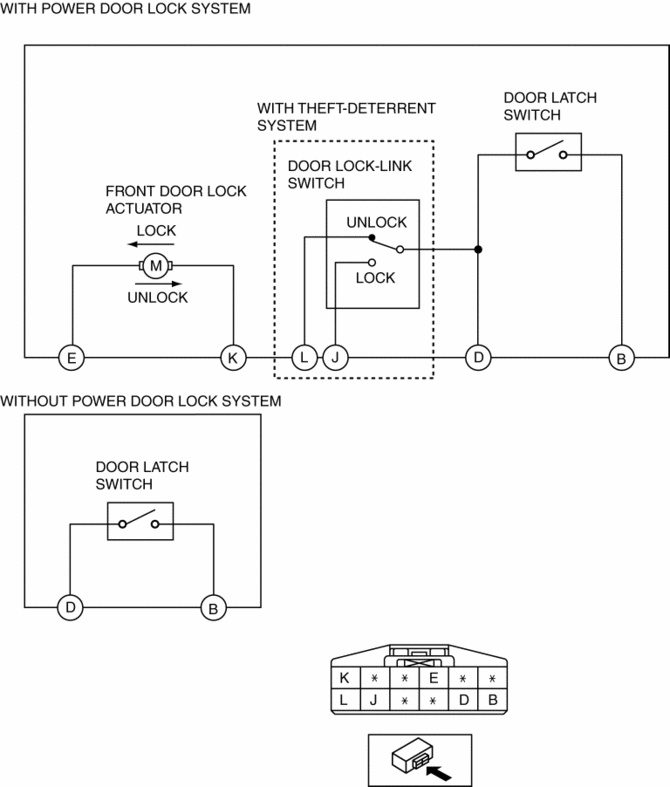
Mazda 3 Service Manual: Front Door Latch And Lock Actuator Inspection
1. The following actuators and switches are integrated with the front door latch and lock actuator. Inspect the front door latch and lock actuator according to each inspection procedure for the following items.
-
Front door lock actuator.
-
Door lock-link switch.
-
Door latch switch.
-
Front door key cylinder.
LH
RH
 Front Door Key Cylinder Switch Inspection
1. To access the glass installation bolt, position the front door glass so that
the distance from the top of the front door glass to the upper part of the front
beltline molding is approx. 80 mm { ...
 Front Door Latch And Lock Actuator Removal/Installation
1. To access the glass installation bolt, position the front door glass so that
the distance from the top of the front door glass to the upper part of the front
beltline molding is approx. 80 mm { ...
Other materials:
Positive Crankcase Ventilation (PCV) Valve Inspection [Mzr 2.0, Mzr 2.5]
Airflow Inspection
1. Disconnect the section (A) of the ventilation hose shown in the figure.
2. Start the engine and verify that vacuum is applied to the end of the disconnected
ventilation hose while the engine is idling.
NOTE:
Because it is difficult to directly inspect the PC ...
Body Control Module (Bcm) Removal/Installation
CAUTION:
When replacing the BCM, the configuration procedure must be performed before
removing the BCM. Replacing the BCM without performing the configuration procedure
will result in system malfunction.
ATX
1. Perform the BCM configuration when replacing it..
2. Disconnect t ...
Afs (Adaptive Front Lighting System) Control Module Removal/Installation
NOTE:
Perform the auto leveling system initialization after newly replacing the
AFS control module to assure that the auto leveling system operates correctly.
1. Disconnect the negative battery cable..
2. Remove the following parts:
a. Passenger-side front scuff plate.
b. Pass ...
