Mazda 3 Service Manual: Hood Latch And Release Lever Removal/Installation
Hood latch
1. Open the hood.
2. Disconnect the negative battery cable..
3. Disconnect the hood latch switch connector. (vehicles with theft-deterrent system)
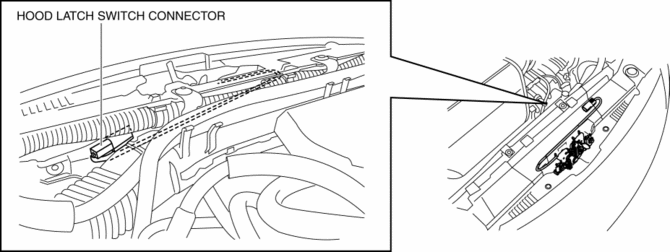
4. Remove the bolts.
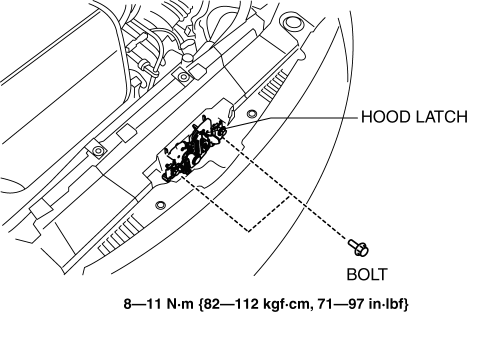
5. Remove the hood latch.
6. Install in the reverse order of removal.
7. Adjust the hood..
Hood release lever
1. Pull the hood release lever.
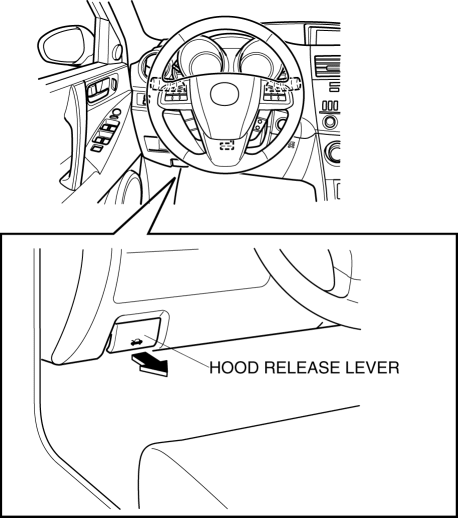
2. While maintaining the condition in procedure 1, insert a tape-wrapped flathead screwdriver as shown in the figure, press the ends of the tabs with the screwdriver in the direction of the arrows (1), pull the hood release lever in the direction of arrow (2), and then disconnect the lower panel.
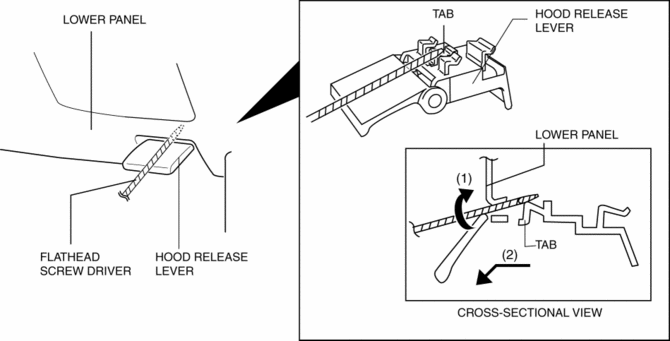
CAUTION:
-
Remove the hood release lever while being careful not to damage the hood release cable with the flathead screwdriver.
3. Pull the latch release lever outward, remove it from the lower panel, and then disconnect the hood release cable.
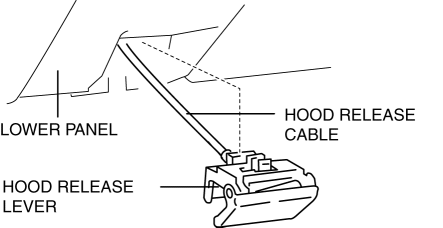
4. Install in the reverse order of removal.
 Hood Disassembly/Assembly
Except Mazdaspeed3
1. Disassemble in the order indicated in the table.
1
Weather strip parting seal
2
Weather strip shroud seal
...
 Hood Latch Switch Inspection
1. Disconnect the negative battery cable..
2. Remove the hood latch..
3. Verify that the continuity is as indicated in the table.
If not as indicated in the table, replace the hood latch.
...
Other materials:
Variable Intake Air Shutter Valve Actuator Inspection [Mzr 2.0, Mzr 2.5]
Operation Inspection
1. Remove the air hose..
2. Disconnect the vacuum hose from the variable intake air shutter valve actuator.
3. Connect a vacuum pump to the variable intake air shutter valve actuator.
NOTE:
Covered with a hood, the rod of the variable intake air shutter valv ...
Fire Extinguisher Installation [Arab Gulf Cooperation Council]
WARNING:
Handling a front seat (with built-in side air bag) improperly can accidentally
operate (deploy) the air bag, which may seriously injure you. Read the service
warnings before handling a front seat (with built-in side air bag)..
CAUTION:
After removing a front seat ...
Car Navigation System
Outline
The car-navigation system displays point-of-origin and road guidance maps
via the audio unit display and provides guidance and information to the desired
point of destination.
NOTE:
For the car-navigation system operation, refer to the owner's manual.
...
