Mazda 3 Service Manual: Joint Shaft Disassembly [Mzr 2.0, Mzr 2.5]
1. Disassemble in the order indicated in the table.
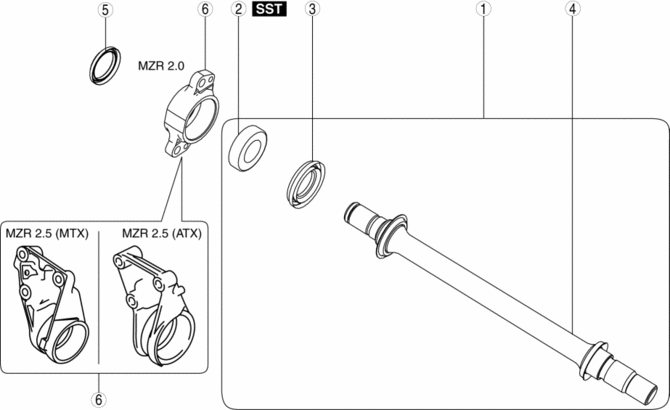
|
1 |
Joint shaft component . |
|
2 |
Bearing . |
|
3 |
Dust seal (LH) |
|
4 |
Joint shaft |
|
5 |
Dust seal (RH) |
|
6 |
Bracket |
Joint Shaft Component Disassembly Note
1. Secure the bracket to the vise at the position shown in the figure and remove the joint shaft component using the plastic hammer.
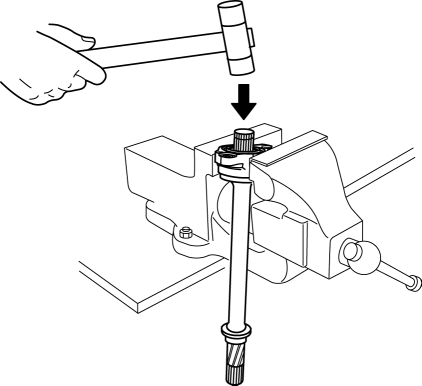
CAUTION:
-
Do not drop the joint shaft because it could be damaged.
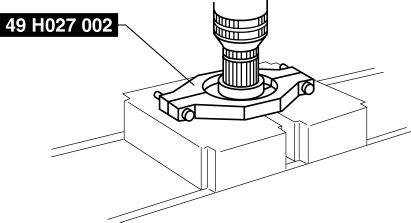
Bearing Disassembly Note
1. Set the SST
and joint shaft to the press.
 Joint Shaft Assembly [Skyactiv G 2.0]
1. Assemble in the order indicated in the table.
1
Dust cover
.
2
Bearing
.
3
Snap ring
4
...
 Joint Shaft Disassembly [Mzr 2.3 Disi Turbo]
1. Disassemble in the order indicated in the table.
1
Joint shaft component
.
2
Bearing
.
3
Dust seal (LH)
...
Other materials:
Front Door Key Cylinder Removal/Installation
1. To access the glass installation bolt, position the front door glass so that
the distance from the top of the front door glass to the upper part of the front
beltline molding is approx. 80 mm {3.1 in}.
2. Disconnect the negative battery cable..
3. Remove the following parts:
a. Inne ...
Moonroof
The moonroof can be opened or closed
electrically only when the ignition is
switched ON.
WARNING
Do not let passengers stand up or
extend part of the body through the
open moonroof while the vehicle is
moving:
Extending the head, arms, or other
parts of the body throu ...
Stop Vehicle in Safe Place Immediately
If any of the following warning lights turns on, the system may have a
malfunction. Stop the
vehicle in a safe place immediately and contact an Authorized Mazda Dealer.
...
