Mazda 3 Service Manual: Liftgate Side Trim Removal/Installation
1. Remove the liftgate upper trim..
2. Pull the point A of the strap hanger as shown in the figure.
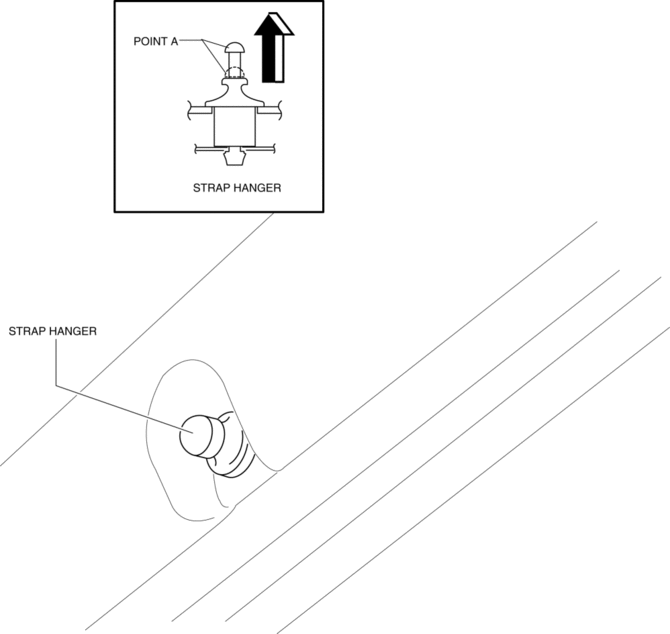
3. Remove the strap hanger.
4. Remove the fastener.
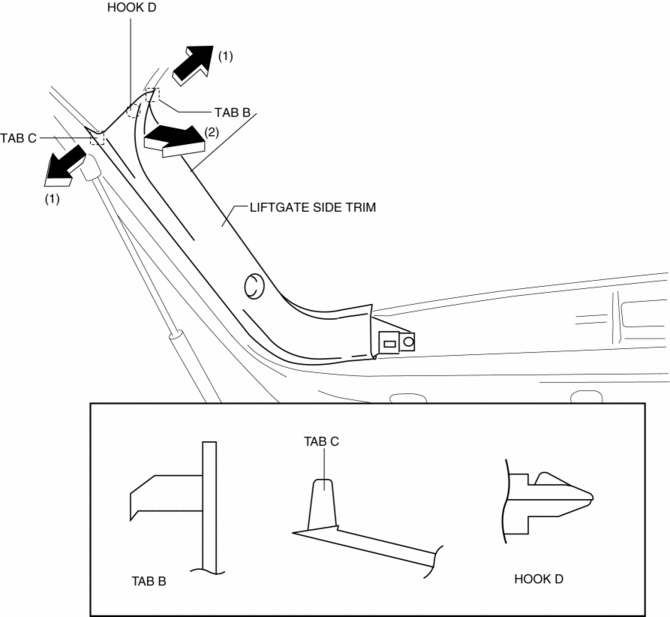
5. Pull the liftgate side trim in the direction of arrow then remove clip A.

6. Detach tab B and C while pulling the liftgate side trim in the direction of the arrow (1) shown in the figure, then detach hook D while pulling in the direction of the arrow (2).
7. Install in the reverse order of removal.
 Liftgate Removal/Installation
WARNING:
When removing the stay damper, serious injury may occur if the stay damper
is removed without supporting the liftgate. Always perform the procedure with
at least another person. ...
 Liftgate Upper Trim Removal/Installation
1. Detach tab while pulling the liftgate upper trim in the direction of the arrow
(1) shown in the figure, then detach clips and pin while pulling in the direction
of the arrow (2).
2. Detac ...
Other materials:
High Beam Control System
(HBC)
The High Beam Control System (HBC) determines the conditions in front of the
vehicle
using the Forward Sensing Camera (FSC) while driving in darkness to
automatically switch
the headlights between high and low beams.
Refer to Warning/Indicator Lights on .
While driving the vehicle at a s ...
Tire inflation pressure
Maintaining the correct tire inflation pressure in your Subaru Solterra
is essential for ensuring safety, efficiency, and optimal driving performance.
Tire pressure in the Subaru Solterra should be checked regularly.
While a monthly check is the minimum requirement, SUBARU strongly recommends i ...
Hood Adjustment
Gap Adjustment
1. Verify that the gap between the hood and the body is within the specification.
Standard clearance
a: -2.8—0.8 mm {-0.11—0.03 in}
b: –1.2—1.2 mm {–0.047—0.0.47 in}
2. Disconnect the negative battery cable..
3. Remove the following parts:
...
