Mazda 3 Service Manual: Oil Cooler Flushing [FS5 A EL]
NOTE:
-
If the automatic transaxle is replaced, flush and inspect the oil cooler.
-
When replacing the automatic transaxle, inspect the oil cooler together with flushing it using the following procedures, and with the oil cooler hose removed.
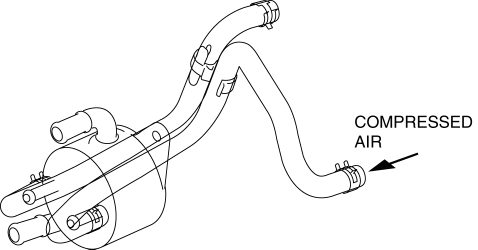
1. Disconnect the oil hose.
2. Set a clean oil pan up to the oil hose inlet.
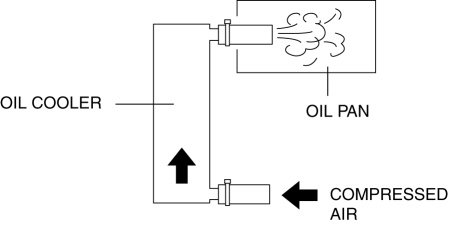
3. Blow 491—882 kPa {5—9 kgf/cm2, 72—127 psi} of compressed air into the oil hose outlet to drain remaining oil.
4. Add new ATF from the oil cooler hose outlet and blow 491—882 kPa {5—9 kgf/cm2, 72—127 psi} of compressed air to flush. (Repeat 2 or 3 times)
5. Verify that none of the following foreign material is mixed in with the drained ATF:
-
Large metal fragments of φ 0.5 mm {0.02 mm} or more that cannot pass through the oil strainer
-
Fibrous clutch facing
6. Repeat the procedures from Step 4 and flush the inside of the oil cooler.
-
If foreign material such as metal fragments or clutch facing remains even after the oil cooler is flushed repeatedly, replace the oil cooler.
 Oil Control Valve (OCV) Removal/Installation [Mzr 2.0, Mzr 2.5]
1. Remove the battery cover..
2. Disconnect the negative battery cable..
3. Remove the plug hole plate..
4. Disconnect the wiring harness.
5. Remove the ignition coils..
6. Remove the ventil ...
 Oil Cooler Removal/Installation [FS5 A EL]
1. Remove the battery cover..
2. Disconnect the negative battery cable.
3. Remove the air cleaner component..
4. Remove the aerodynamic under cover NO.2..
5. Drain the ATF..
6. Drain the eng ...
Other materials:
Charcoal Canister Inspection [Mzr 2.0, Mzr 2.5]
Leakage Inspection
1. Perform the following procedures:
Assemble the hose used for inspection to port A.
Cover ports B and C with the caps.
Except for Mexico
Mexico
CAUTION:
Do not apply a pressure 20 kPa {150 mmHg, 5.91 inHg} or more to the charcoal
cani ...
Outside Temperature Display
When the ignition is switched ON, the
outside temperature is displayed.
NOTE
Under the following conditions, the
outside temperature display may differ
from the actual outside temperature
depending on the surroundings and vehicle
conditions:
Significantly cold or hot
temperatures.
...
Vacuum Hose Removal/Installation [Mzr 2.0, Mzr 2.5]
1. Remove the battery and battery tray..
2. Remove the vacuum hose from the vacuum hose clip.
3. Insert a thin flathead screwdriver at the point indicated by the arrow in
the figure, push the ring down and disconnect the vacuum hose from the intake manifold.
4. Move the vacuum hose ...
