Mazda 3 Service Manual: Oil Seal (Differential) Replacement [C66 M R]
1. Remove the aerodynamic under cover No.2 and the splash shield as a single unit..
2. Drain the manual transaxle oil..
3. Disconnect the drive shaft (LH) from the MTX..
4. Disconnect the drive shaft (RH) from the joint shaft..
5. Remove the joint shaft..
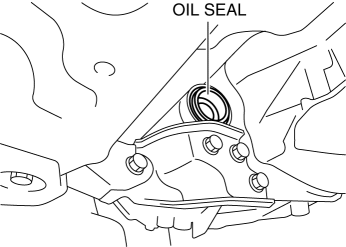
6. Remove the oil seal (LH).
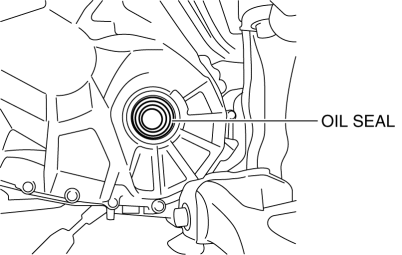
7. Remove the oil seal (RH).
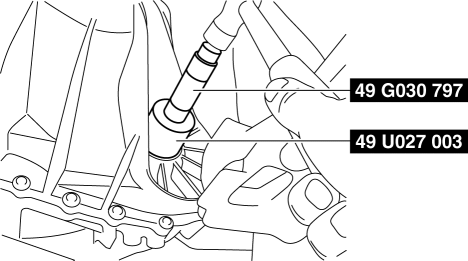
8. Using the SST
s and a hammer, tap each a new oil seal (LH) in evenly until the SST
s contacts the transaxle case.
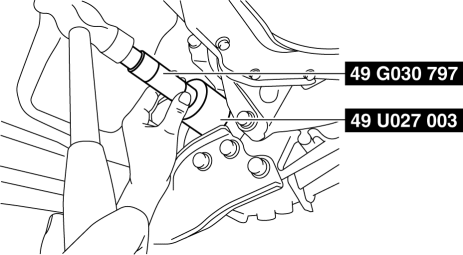
9. Using the SST
s and a hammer, tap each a new oil seal (RH) in evenly until the SST
s contacts the transaxle case.
10. Coat the lip of each oil seal with transaxle oil.
11. Install in the reverse order of removal.
12. Add the specified amount of specified transaxle oil..
 Oil Seal (Differential) Replacement [A26 M R]
1. On level ground, jack up the vehicle and support it evenly on safety stands.
2. Drain the oil from the transaxle..
3. Remove the front tires..
4. Remove the splash shield..
5. Remove the a ...
 Oil Seal (Differential) Replacement [Fw6 A EL]
1. Remove the aerodynamic under cover No.2 and the splash shield as a single
unit..
2. Remove the oil seal.
a. Drain the ATF..
b. Disconnect the drive shaft (LH) from the transaxle..
c. Disc ...
Other materials:
Air Cleaner Element Inspection [Mzr 2.0, Mzr 2.5]
1. Remove the air cleaner element..
2. Inspect the following items:
Has the replacement interval come?
Is the air cleaner element soiled, damaged, or bent?
Are the air cleaner case and the air cleaner element correctly sealed?
Is the correct air cleaner element inst ...
Glossary of Terms
Tire Placard: A label indicating the OE tire sizes, recommended inflation
pressure, and the
maximum weight the vehicle can carry.
Tire Identification Number (TIN): A number on the sidewall of each tire
providing
information about the tire brand and manufacturing plant, tire size, and date o ...
PKSB (Parking Support Brake)
The Subaru Solterra PKSB (Parking Support Brake) system is engineered
to assist the driver during low-speed maneuvers, such as parking, by issuing warnings
and automatically applying braking force to help reduce potential collision damage
with detected obstacles.
PKSB (Parking Support Brake) ...
