Mazda 3 Service Manual: Rear Door Pad Removal/Installation
1. Fully open the rear door glass.
2. Disconnect the negative battery cable..
3. Remove the following parts:
a. Rear door trim.
b. Rear door speaker.
c. Rear power window motor.
d. Rear door quarter glass.
e. Rear door glass.
f. Rear door module panel.
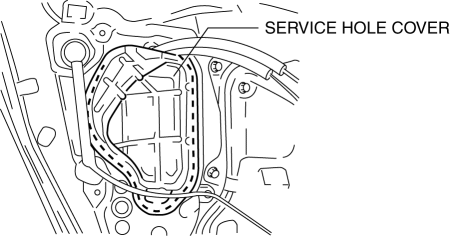
4. Remove the service hole cover.
5. Remove the fasteners A.
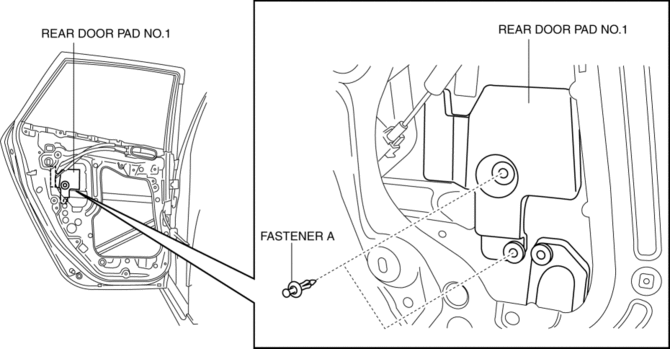
6. Remove the rear door pad No.1.
7. Remove the fasteners B.
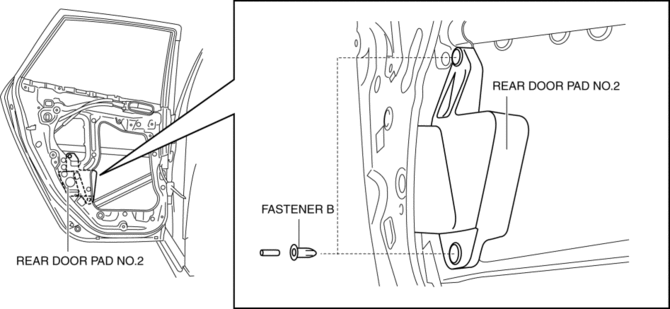
8. Remove the rear door pad No.2.
9. Install in the reverse order of removal.
 Rear Door Module Panel Removal/Installation
1. Fully open the rear door glass.
2. Disconnect the negative battery cable..
3. Remove the following parts:
a. Rear door trim.
b. Rear door speaker.
c. Rear power window motor.
d. Rear do ...
 Rear Door Removal/Installation
WARNING:
Removing the rear door without supporting it could cause the rear door to
fall and cause serious injury. Always perform the procedure with at least another
person to prevent the ...
Other materials:
If the vehicle becomes stuck
If your Subaru Solterra becomes immobilized in mud, snow, or loose
terrain, follow the steps below to safely regain traction and mobility.
Recovering procedure
1. Turn off the EV system, apply the parking brake, and set the gear selector
to P.
2. Clear away mud, snow, or sand from around the ...
Essential Information
Be extremely careful and prevent injury to yourself and others or damage to
your vehicle
when using this manual for inspection and maintenance.
If you are unsure about any procedure it describes, we strongly urge you to have
a reliable
and qualified service shop perform the work, preferably ...
Manual Transaxle Removal/Installation [A26 M R]
CAUTION:
Secure the steering wheel using tape or a cable to prevent the steering shaft
from rotating after disconnecting the steering shaft. If the steering wheel
rotates after the steering shaft and the steering gear and linkage are disconnected,
the internal parts of the clock spr ...
