Mazda 3 Service Manual: Rear Washer Hose Removal/Installation
1. Disconnect the negative battery cable..
2. Remove the front mudguard (RH)..
3. Disconnect rear washer hose A from the washer motor.
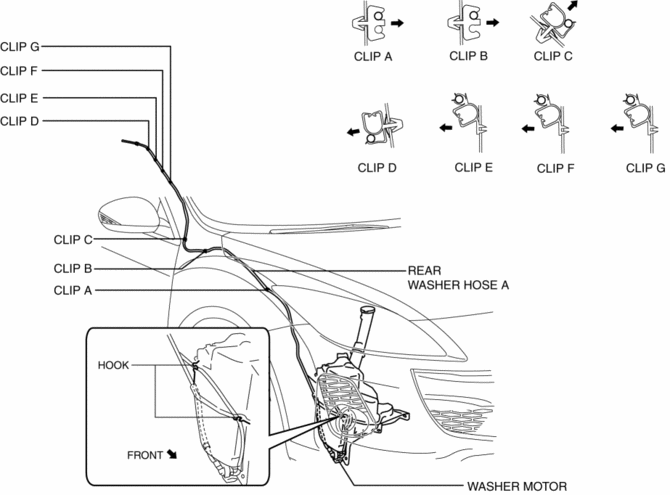
4. Remove the rear washer hose A from clip A, B, C, D, E, F, G.
5. Disconnect joint pipes and remove rear washer hose A.
6. Partially peel back the seaming welts.
7. Remove the following parts:
a. Sunroof seaming welt (vehicles with sunroof only)
b. A–pillar trims.
c. Front scuff plate.
d. Rear scuff plate.
e. B-pillar lower trim.
f. Upper anchor of the front seat belt.
g. B–pillar upper trim.
h. Rear seat cushion.
i. Tire house trim.
j. Trunk side upper trim.
k. C–pillar trim.
l. Map light.
m. Interior light.
n. Sunvisor.
o. Assist handle.
p. Headliner.
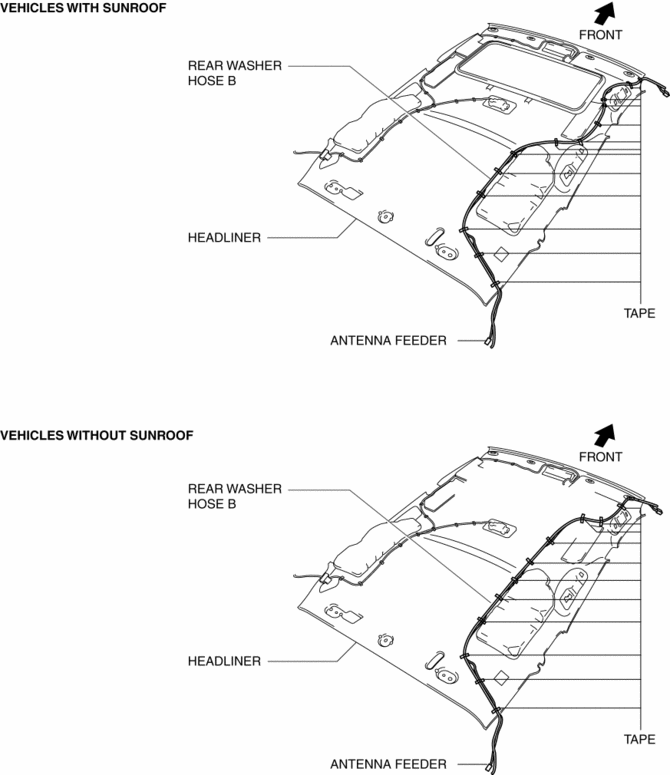
8. Peel off the tape and remove rear washer hose B.
9. Remove the liftgate upper trim..
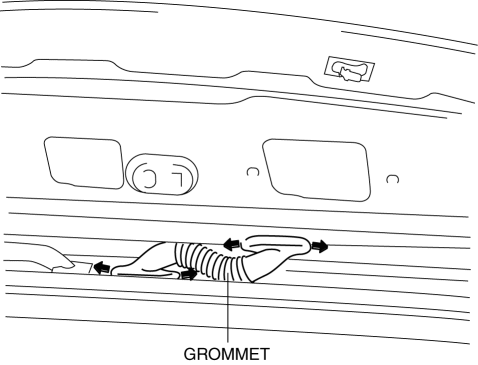
10. Partially peel back the grommet.
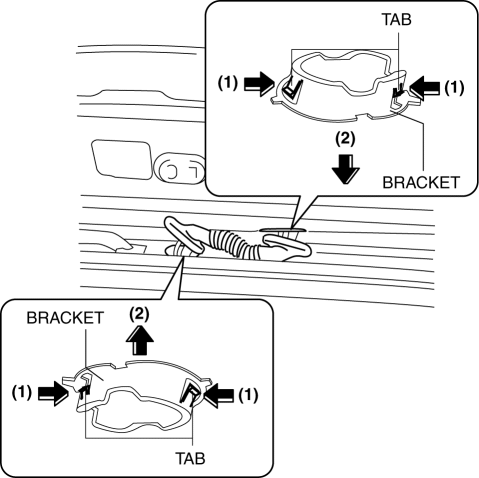
11. Remove the bracket in the direction of the arrow (2) shown in the figure while pressing the bracket tabs in the direction of the arrow (1).
12. Remove the rear washer hose C from clip H, I, J, K.
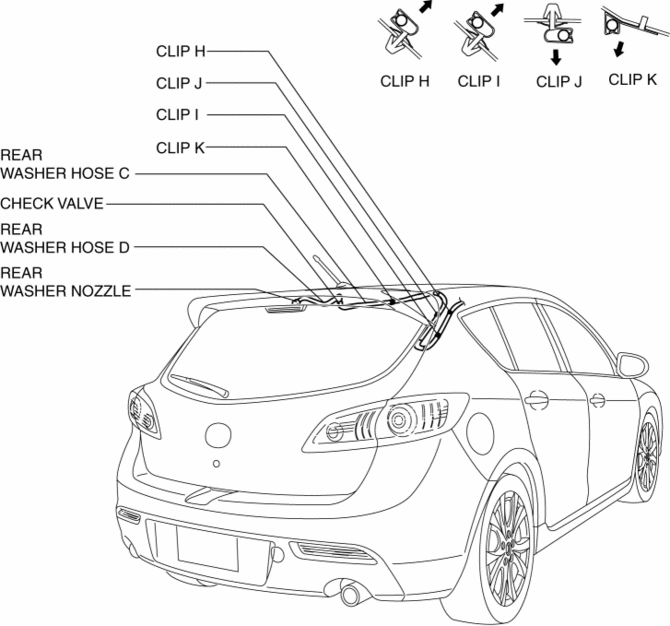
13. Disconnect joint pipes and remove rear washer hose C.
14. Disconnect check valve and remove rear washer hose C.
15. Remove rear washer hose D from the rear washer nozzle.
16. Install in the reverse order of removal.
 Washers
...
 Rear Washer Nozzle Adjustment
1. Insert a needle or an equivalent tool into the spray hole of the rear washer
nozzle and adjust the nozzle direction as shown.
...
Other materials:
Front Bumper Removal/Installation
1. Disconnect the negative battery cable..
2. Remove the screw A and fasteners B.
3. Remove the screws C.
4. Remove the bolts D.
5. Remove the fasteners E, screw F and fastener G.
6. Pull the front bumper in the direction of the arrow in the order of (1), (2)
and (3), the ...
Heated Oxygen Sensor (HO2 S) Inspection [Mzr 2.0, Mzr 2.5]
HO2S Inspection
1. Connect the M-MDS to the DLC-2.
2. Switch the ignition to ON.
3. Warm up the engine to normal operating temperature.
4. Access the following PIDs using the M-MDS..
VSS (Vehicle speed)
RPM (Engine speed)
O2S12 (HO2S output voltage)
5. Drive ...
General Procedures (Brake)
Wheel and Tire Installation
1. When installing the wheels and tires, tighten the wheel nuts in a criss-cross
pattern to the following tightening torque.
Tightening torque
88—118 N·m {9.0—12 Kgf·m, 65—87 ft·lbf}
Brake Lines Disconnection
1. If any brake line has been ...
