Mazda 3 Service Manual: Side Step Molding Installation
NOTE:
-
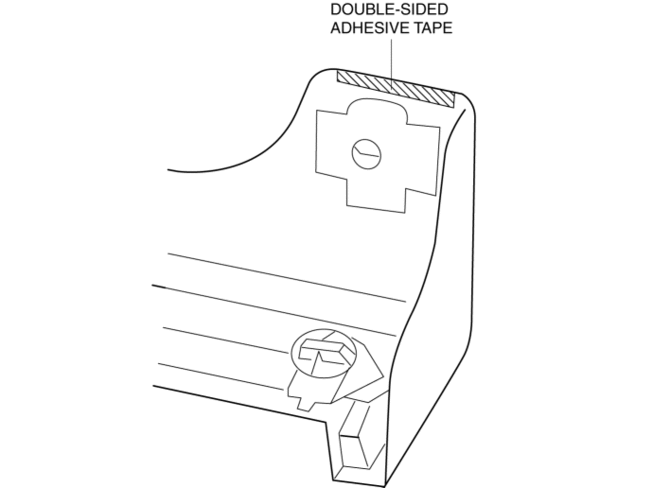
Double-sided adhesive tape has already been adhered to a new side step molding for installation.
-
When a side step molding is to be reused, perform the following procedure:
1. Remove any grease or dirt from the affixing surface of the side step molding.
2. Affix double-sided adhesive tape to the position shown in the figure.
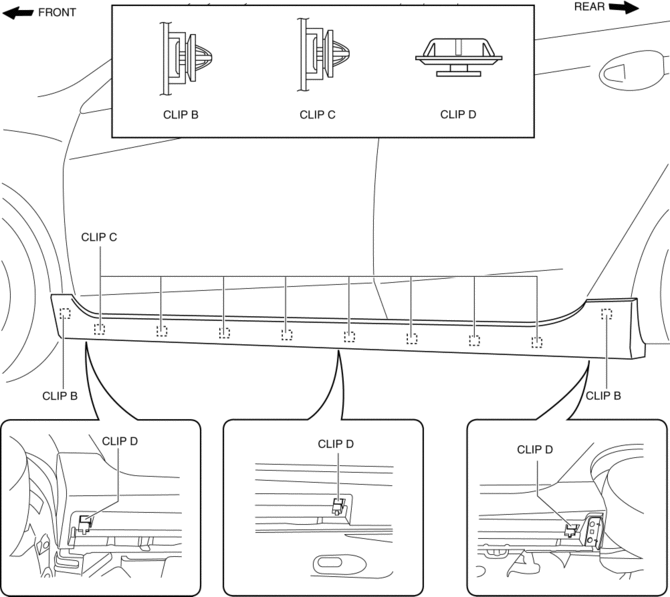
1. Install the clips B, C and D to the side step molding.
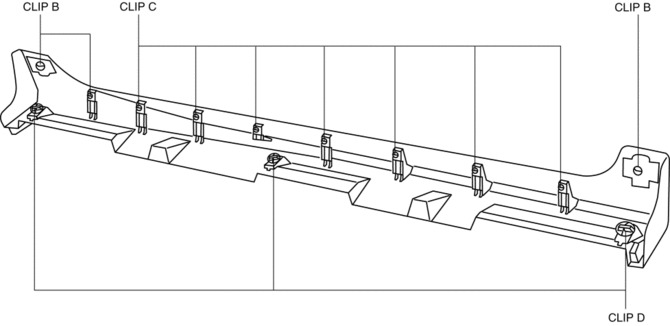
2. Install the side step molding while pushing the clips B, C, and D installation area shown in the figure.
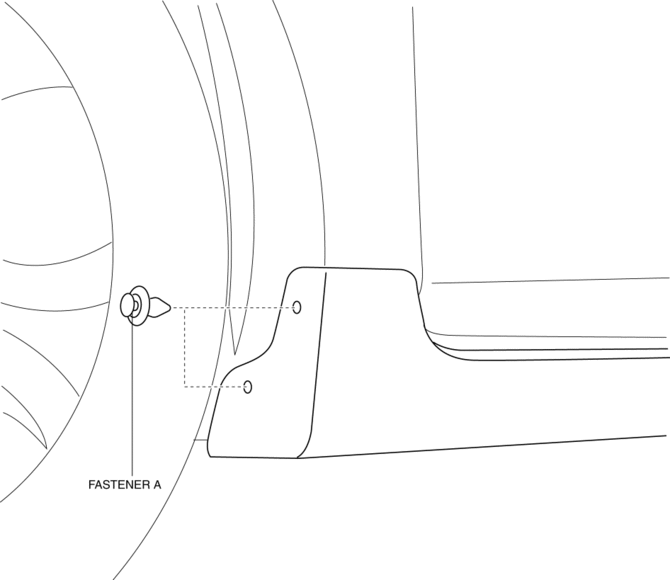
3. Install the fasteners A.
 Side Panel Removal/Installation
1. Insert a tape-wrapped fastener remover into the position indicated by the
arrow in the figure.
2. Pull the side panel in the direction of the arrow shown in the figure, then
remove the clips ...
 Side Step Molding Removal
1. Remove the fasteners A.
2. Using the removal tool, disengage clips B in the direction of the arrow (1),
(2) shown in the figure.
NOTE:
Leave the disengaged clip B in place in ...
Other materials:
Aerodynamic Under Cover No.2 Removal/Installation
Except SKYACTIV-G 2.0
1. Lift up the vehicle.
2. Remove the fasteners and bolts.
3. Move the aerodynamic under cover No.2 in the direction of the arrow shown
in the figure and remove it.
CAUTION:
Be careful not to damage the aerodynamic under cover No.2 during removal.
4. ...
Driver Side Air Bag Module Removal/Installation [Two Step Deployment Control
System]
WARNING:
Handling the air bag module improperly can accidentally deploy the air bag
module, which may seriously injure you. Read the air bag system service warnings
and cautions before handling the air bag module..
Due to the adoption of 2-step deployment control in the driver- ...
Parking in an Emergency
The hazard warning lights should always
be used when you stop on or near a
roadway in an emergency
The hazard warning lights warn other
drivers that your vehicle is a traffic hazard
and that they must take extreme caution
when near it.
Depress the hazard warning flasher and
all the t ...
