Mazda 3 Service Manual: Vacuum Hose Removal/Installation [Mzr 2.3 Disi Turbo]
1. Remove the charge air cooler cover..
2. Remove the charge air cooler..
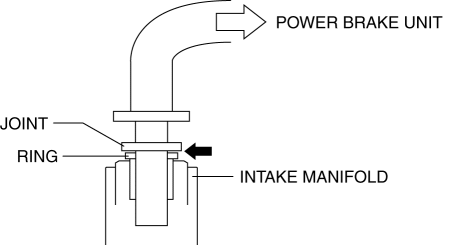
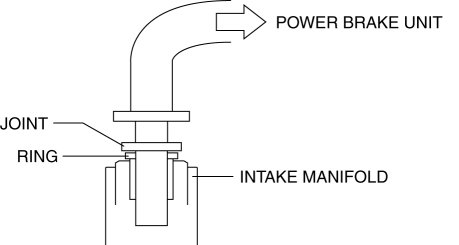
3. Insert a thin flathead screwdriver at the point indicated by the arrow in the figure, push the ring down and disconnect the vacuum hose from the intake manifold.
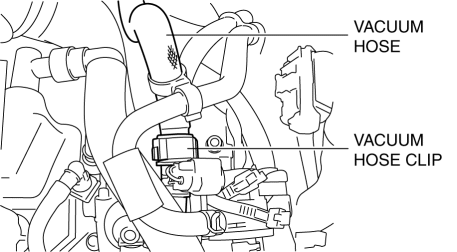
4. Remove the vacuum hose from the vacuum hose clip.
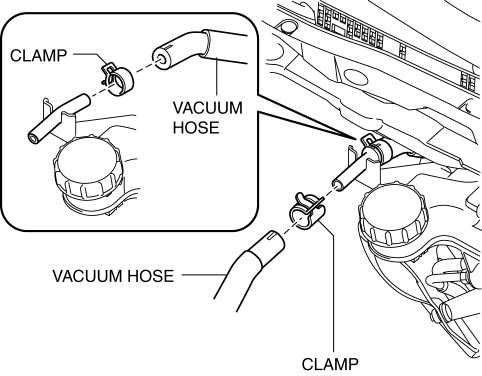
5. Pinch open the clamps using pliers and disconnect the vacuum hoses from the insulator bracket as shown in the figure.
6. Pinch open the clamp using pliers and disconnect the vacuum hose from the power brake unit.
7. Remove the vacuum hose.
8. Install in the reverse order of removal.
9. Verify that the vacuum hose is inserted so that the joint contacts the intake manifold ring.
 Vacuum Hose Removal/Installation [Mzr 2.0, Mzr 2.5]
1. Remove the battery and battery tray..
2. Remove the vacuum hose from the vacuum hose clip.
3. Insert a thin flathead screwdriver at the point indicated by the arrow in
the figure, push th ...
 Vacuum Hose Removal/Installation [Skyactiv G 2.0]
1. Remove the plug hole plate..
2. Remove the battery and battery tray..
3. Remove the vacuum hose from the vacuum hose clip.
4. Pinch open the clamp using pliers and disconnect the vacuum h ...
Other materials:
Hood Release Cable Removal/Installation
1. Disconnect the negative battery cable..
2. Remove the battery tray..
3. Remove the Front mudguard (LH)..
4. Remove the hood release cable from clips A.
5. Remove the clips B.
6. Disconnect the hood latch from the hood release cable.
7. Remove the hood release cable from outside of ...
Pictorial index
■ Exterior
Side doors
Locking/unlocking
Opening/closing the side windows
Locking/unlocking by using the mechanical key
Warning messages related to Subaru Solterra door systems
Back door
Locking/unlocking
Opening/closing the back door
Warning messages
Power back door* f ...
Gps Antenna Feeder Inspection
With Audio Unit (Without Display)
1. Verify that the continuity is as indicated in the table.
If not as indicated in the table, replace the GPS antenna feeder.
With Audio Unit (With Display)
NOTE:
GPS antenna feeder is integrated with the antenna feeder No.4.
1. ...
