Mazda 3 Service Manual: Variable Valve Timing Actuator Inspection [Mzr 2.0, Mzr 2.5]
CAUTION:
-
Variable valve timing actuator can not be disassembled because it is a precision unit.
1. Remove the battery cover..
2. Disconnect the negative battery cable..
3. Remove the plug hole plate..
4. Disconnect the wiring harness.
5. Remove the ignition coils..
6. Remove the spark plugs..
7. Remove the ventilation hose.
8. Remove the oil level gauge.
9. Remove the cylinder head cover..
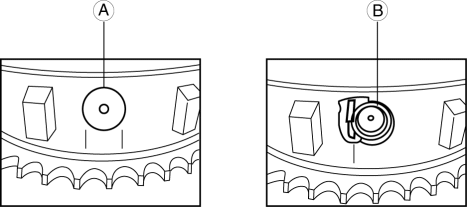
10. Inspect the variable valve timing actuator for damage around the stopper pin cap (A), or a missing stopper pin cap (B), spring and stopper.
-
If no parts are damaged or missing, go to the next step.
-
If any parts are damaged or missing, replace the variable valve timing actuator..
CAUTION:
-
If any parts are damaged or missing, remove the front cover to inspect the timing and oil pump chains and all related components for damage as a result of lost parts. Replace components if necessary.
-
If the lost parts cannot be located in the timing chain area, it will be necessary to remove the oil pan to retrieve them.
11. Turn the crankshaft clockwise so that the notches on the variable valve timing actuator can be checked.
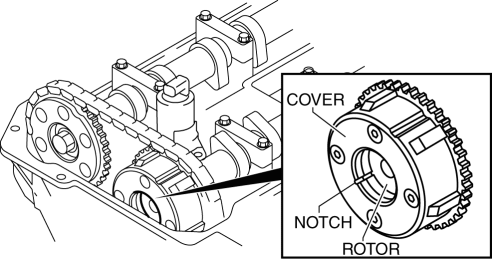
12. Turn the camshaft counterclockwise to align the notches on the variable valve timing actuator.
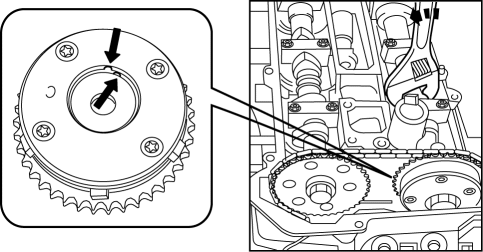
13. With the notches aligned, turn the camshaft clockwise 30 degrees.
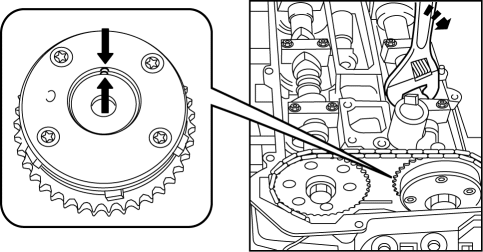
14. Verify the notches again.
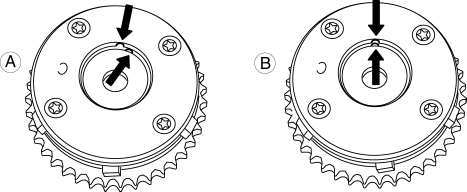
-
A: If the notches are not aligned, replace the variable valve timing actuator..
-
B: If the notches are aligned, there is no problem with the variable valve timing actuator.
NOTE:
-
In some rare cases, the timing chain tensioner ratchet lock may get stuck, which will require the removal of the engine front cover.
15. Install in the reverse order of removal.
 Variable Tumble Solenoid Valve Inspection [Mzr 2.0, Mzr 2.5]
Airflow Inspection
1. Remove the battery cover..
2. Disconnect the negative battery cable..
3. Remove the variable tumble solenoid valve..
4. Inspect airflow between the ports under the followi ...
 Variable Valve Timing Actuator Inspection [Mzr 2.3 Disi Turbo]
CAUTION:
Variable valve timing actuator cannot be disassembled because it is a precision
unit.
1. Remove the battery cover..
2. Disconnect the negative battery cable..
3. Remove t ...
Other materials:
Interior Equipment (View A)
Door-lock knob
Turn and lane-change signal
Lighting control
Wiper and washer lever
DSC OFF switch
Tire pressure monitoring system set switch
LDWS switch
AFS OFF switch
BSM OFF switch
Headlight leveling switch
Outside mirror switch
Door-lock switch
Power window lock s ...
Drive Shaft Inspection
1. Inspect the connections for any looseness.
If there is any malfunction, tighten or replace the applicable part.
2. Inspect the dust boot for damage and cracks.
If there is any malfunction, replace the applicable part.
3. Move the spline and joint up and down, left ...
Front Power Window Regulator Removal/Installation
1. To access the glass installation bolt, position the front door glass so that
the distance from the top of the front door glass to the upper part of the front
beltline molding is approx. 80 mm {3.1 in}.
2. Disconnect the negative battery cable..
3. Remove the following parts:
a. Inne ...
