Mazda 3 Service Manual: Transaxle Fluid Temperature (Tft) Sensor Inspection [FS5 A EL]
CAUTION:
-
Water or foreign objects entering the connector can cause a poor connection or corrosion. Be sure not to drop water or foreign objects on the connector when disconnecting it.
On-Vehicle Inspection
1. Perform the following procedures.
a. Remove the battery cover..
b. Disconnect the negative battery cable.
c. Remove the air cleaner component..
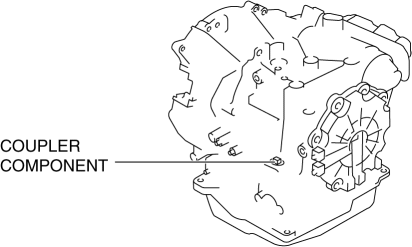
d. Disconnect the coupler component connector.
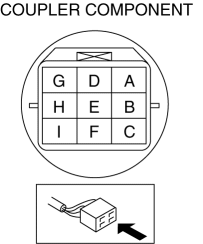
2. Measure the resistance between the coupler component terminals E and H.
-
If there is any malfunction, replace the TFT sensor..
|
ATF temperature (°C{°F}) |
Resistance (kilohm) |
|
-20 {-4} |
236—324 |
|
0 {32} |
84.3—110 |
|
20 {68} |
33.5—42.0 |
|
40 {104} |
14.7—17.9 |
|
60 {140} |
7.08—8.17 |
|
80 {176} |
3.61—4.15 |
|
100 {212} |
1.96—2.24 |
|
120 {248} |
1.13—1.28 |
|
130 {266} |
0.87—0.98 |
Off-Vehicle Inspection
1. Place the TFT sensor and a thermometer in ATF as shown, and heat the ATF gradually.
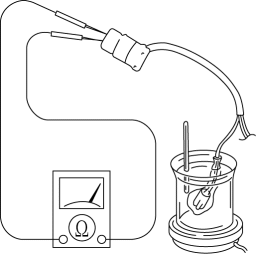
WARNING:
-
A hot ATF and beaker can cause severe burns. Do not touch them.
2. Measure the resistance between the coupler component terminals E and H.
-
If there is any malfunction, replace the TFT sensor..
|
ATF temperature (°C{°F}) |
Resistance (kilohm) |
|
-20 {-4} |
236—324 |
|
0 {32} |
84.3—110 |
|
20 {68} |
33.5—42.0 |
|
40 {104} |
14.7—17.9 |
|
60 {140} |
7.08—8.17 |
|
80 {176} |
3.61—4.15 |
|
100 {212} |
1.96—2.24 |
|
120 {248} |
1.13—1.28 |
|
130 {266} |
0.87—0.98 |
 Inspection After Transaxle Installation [G66 M R]
NOTE:
Perform the following inspection only when the transaxle has been overhauled.
1. Perform a road test and inspect the following items:
a. No abnormal noise in each shift position. ...
 Transaxle Fluid Temperature (Tft) Sensor Removal/Installation [FS5 A EL]
WARNING:
A hot transaxle and ATF can cause severe burns. Turn off the engine and wait
until they are cool.
1. Remove the primary control valve body.
a. Remove the battery cover..
...
Other materials:
Floor Mat
WARNING
Make sure the fl oor mats are hooked on
the retention pins to prevent them from
bunching up under the foot pedals:
Using a fl oor mat that is not secured is
dangerous as it will interfere with the
accelerator and brake pedal operation,
which could result in an acc ...
Drive mode select switch
The drive modes of the Subaru Solterra can be adjusted to match different
driving conditions, ensuring optimal performance, efficiency, and comfort.
Selecting a drive mode
By pressing the drive mode select switch, the Subaru Solterra cycles through
three distinct driving modes: Power mode, Nor ...
Side Air Bag Sensor No. 2 Removal/Installation [Two Step Deployment Control
System]
WARNING:
Handling the side air bag sensor improperly can accidentally operate (deploy)
the air bag module, which may seriously injure you. Read the air bag system
service warnings and cautions before handling the side air bag sensor..
1. Switch the ignition to off.
2. Disconnec ...
