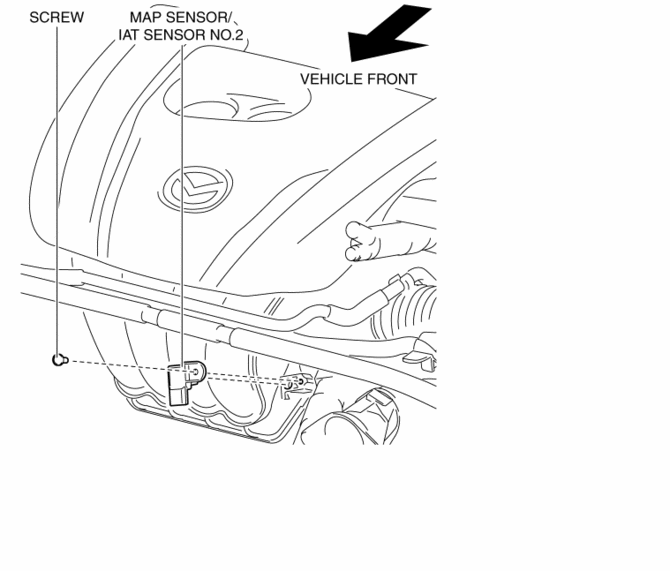
Mazda 3 Service Manual: Manifold Absolute Pressure (Map) Sensor/Intake Air Temperature (Iat) Sensor No.2 Removal/Installation [Skyactiv G 2.0]
NOTE:
-
Because the IAT sensor No.2 is integrated in the MAP sensor, replacing the IAT sensor No.2 includes replacement of the MAP sensor/IAT sensor No.2.
1. Remove the battery cover..
2. Disconnect the negative battery cable..
3. Disconnect the MAP sensor/IAT sensor No.2 connector.
4. Remove the MAP sensor/IAT sensor No.2.

5. Install in the reverse order of removal.
 Manifold Absolute Pressure (Map) Sensor/Boost Air Temperature Sensor Removal/Installation
[Mzr 2.3 Disi Turbo]
NOTE:
Because the boost air temperature sensor is integrated in the MAP sensor,
replacing the boost air temperature sensor includes replacement of the MAP sensor/boost
air temperature se ...
 Mass Air Flow (MAF) Sensor Inspection [Mzr 2.0, Mzr 2.5]
Visual Inspection
1. Remove the battery cover..
2. Disconnect the negative battery cable..
3. Disconnect the MAF/IAT sensor connector.
4. Remove the MAF/IAT sensor..
5. Visually inspect the M ...
Other materials:
Spark Plug Inspection [Mzr 2.3 Disi Turbo]
Specification
Spark plug type
L3BD-18110, L3YD-18110
Plug Gap Inspection
CAUTION:
To avoid possible damage to the tip, do not adjust the plug gap.
To prevent damaging the tip, use a wire type plug gap gauge when inspecting
the plug gap.
1. Measure the spark p ...
Receiver/Drier Removal/Installation
MZR 2.0, MZR 2.5, SKYACTIV-G 2.0
1. Disconnect the negative battery cable..
2. Discharge the refrigerant..
3. Remove the aerodynamic under cover No.2..
4. Remove the aerodynamic under cover No.1..
5. Remove the front bumper..
6. Disconnect the block joint type pipes by grasping female sid ...
Discharge Headlight Control Module Removal/Installation
CAUTION:
Incorrect servicing of the discharge headlights could result in electrical
shock. Before servicing the discharge headlights, always refer to the discharge
headlight service warnings..
1. Disconnect the negative battery cable..
2. Remove the front bumper..
3. Remove t ...
