Mazda 3 Service Manual: Mass Air Flow (MAF) Sensor Inspection [Mzr 2.0, Mzr 2.5]
Visual Inspection
1. Remove the battery cover..
2. Disconnect the negative battery cable..
3. Disconnect the MAF/IAT sensor connector.
4. Remove the MAF/IAT sensor..
5. Visually inspect the MAF/IAT sensor for the following:
-
Damage, cracks, soiling
-
Rusted sensor terminal
-
Bent sensor terminal
-
If there is any malfunction, repair or replace the MAF/IAT sensor..
Voltage Inspection
1. Remove the battery cover..
2. Disconnect the negative battery cable..
3. Remove the MAF/IAT sensor without disconnect the MAF/IAT sensor connector..
4. Reconnect the negative battery cable..
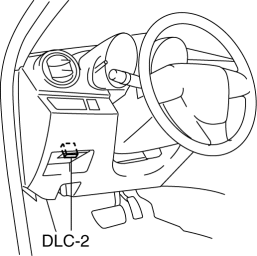
5. Connect the M-MDS to the DLC-2.
6. Switch the ignition to ON.
7. As the air gradually approaches the MAF detection part of the MAF/IAT sensor, verify that the MAF sensor output voltage (PID: MAF) varies..
-
If not as verified, replace the MAF/IAT sensor..
 Manifold Absolute Pressure (Map) Sensor/Intake Air Temperature (Iat) Sensor
No.2 Removal/Installation [Skyactiv G 2.0]
Manifold Absolute Pressure (Map) Sensor/Intake Air Temperature (Iat) Sensor
No.2 Removal/Installation [Skyactiv G 2.0]
NOTE:
Because the IAT sensor No.2 is integrated in the MAP sensor, replacing the
IAT sensor No.2 includes replacement of the MAP sensor/IAT sensor No.2.
1. Remove the battery cover.. ...
 Mass Air Flow (MAF) Sensor/Intake Air Temperature (Iat) Sensor No.1 Removal/Installation
[Skyactiv G 2.0]
Mass Air Flow (MAF) Sensor/Intake Air Temperature (Iat) Sensor No.1 Removal/Installation
[Skyactiv G 2.0]
CAUTION:
Be careful not to hit the sensor element or allow foreign matter to get on
it during sensor removal/installation. If the sensor element is hit or foreign
matter gets on it, an e ...
Other materials:
Installation Of Radio System
The control modules and control unit have been designed with sufficient attention
to radio wave disturbances from the outside. However, observe the following precautions
when installing the radio set to the vehicle to prevent adverse effects on the control
modules and control unit.
Inst ...
Tire Pressure Monitoring System
The Tire Pressure Monitoring System (TPMS) monitors the air pressure of all
four tires. If
the air pressure of one or more tires is too low, the system warns the driver by
indicating the
tire pressure monitoring system warning light in the instrument cluster and
operating a beep
sound. The ...
Operational Range
The system operates only when the driver
is in the vehicle or within operational
range while the key is being carried.
Starting the Engine
NOTE
Starting the engine may be possible
even if the key is outside of the vehicle
and extremely close to a door and
window, however, always start ...
