Mazda 3 Service Manual: Oil Seal (Differential) Replacement [A26 M R]
1. On level ground, jack up the vehicle and support it evenly on safety stands.
2. Drain the oil from the transaxle..
3. Remove the front tires..
4. Remove the splash shield..
5. Remove the aerodynamic under cover No.2..
6. Separate the drive shaft and joint shaft from the transaxle..
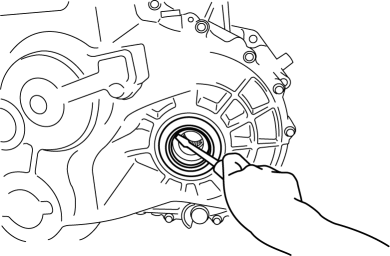
7. Remove the oil seals using a screwdriver.

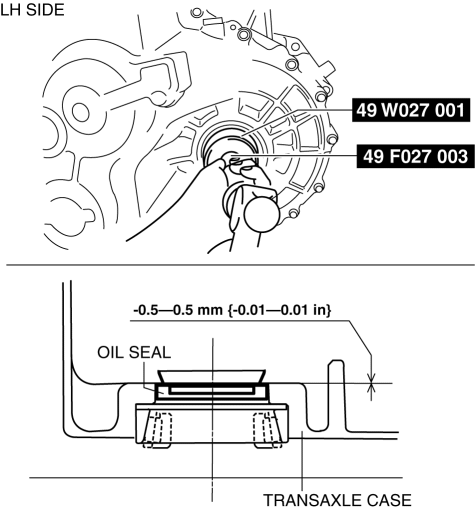
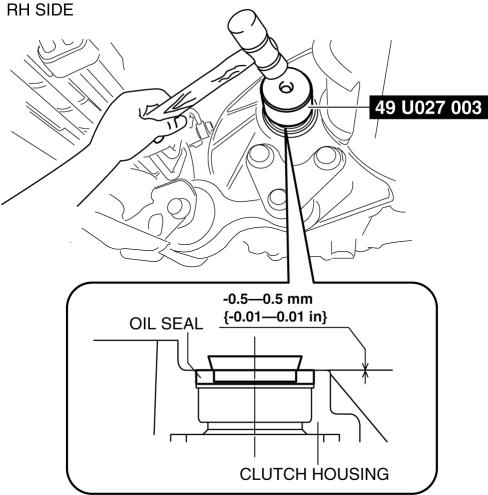
8. Using the SSTs
and a hammer, tap each new oil seal in evenly until the SSTs
contact the transaxle case.


9. Coat the lip of each oil seal with transaxle oil.
10. Insert the drive shaft and joint shaft to the transaxle..
11. Install the aerodynamic under cover No.2..
12. Install the splash shield..
13. Install the front tires..
14. Add the specified amount and type of oil..
 Differentials
...
 Oil Seal (Differential) Replacement [C66 M R]
1. Remove the aerodynamic under cover No.2 and the splash shield as a single
unit..
2. Drain the manual transaxle oil..
3. Disconnect the drive shaft (LH) from the MTX..
4. Disconnect the driv ...
Other materials:
Power Metal Oxide Semiconductor Field Effect Transistor (Power Mos Fet) Inspection
[Full Auto Air Conditioner]
1. Verify that the continuity between the power MOS FET terminals is as indicated
in the table.
If there is any malfunction, replace the power MOS FET.
If the blower motor operation is not normal even though no malfunction can
be verified, inspect the climate control unit..
...
Drive Belt Inspection [Mzr 2.0, Mzr 2.5]
MZR 2.0
A/C drive belt
NOTE:
Drive belt deflection/tension inspection is not necessary because of the
use of the maintenance-free type A/C drive belt.
Replace the drive belt if it is found to be damaged during visual inspection,
or if there is a malfunction or noise in th ...
Air Bleeding
CAUTION:
If the strainer is removed, impurities may penetrate the power steering system
and damage it. To prevent this, always bleed air with the strainer installed.
Do not maintain the steering wheel fully turned for 5 s or more. The oil
temperature could rise and damage ...
