Mazda 3 Service Manual: Transaxle Range (TR) Switch Adjustment [FS5 A EL]
CAUTION:
-
Water or foreign objects entering the connector can cause a poor connection or corrosion. Be sure not to drop water or foreign objects on the connector when disconnecting it.
1. Engage the parking brake and use wheel chocks at the front and rear of the wheels.
2. Shift the selector lever to the N position.
3. Perform the following procedures.
a. Remove the battery cover..
b. Disconnect the negative battery cable.
c. Remove the air cleaner component..
d. Disconnect the TR switch connector.
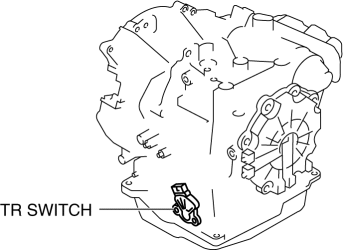
4. Loosen the TR switch.
a. Remove the clip from the selector cable.
b. Disconnect the selector cable from manual shaft lever.
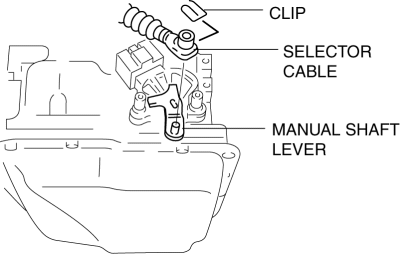
c. Loosen the TR switch installation bolts.
5. Adjust the TR switch.
a. Verify that the manual shaft is aligned with the N position.
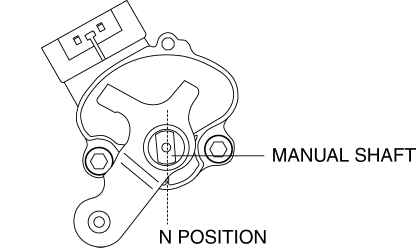
b. Adjust the TR switch between terminals B and C until the resistance becomes specification.
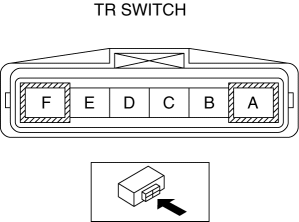
-
TR switch specification
-
713—787 ohms
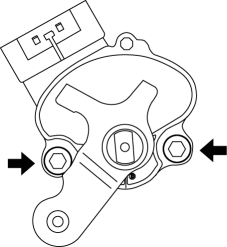
c. Tighten the TR switch installation bolts.
-
Tightening torque
-
8—11 N·m {82—112 kgf·cm, 71—97 in·lbf}
 Transaxle Oil Replacement [G66 M R]
1. Park the vehicle on level ground.
2. Remove the aerodynamic under cover No.2..
3. Remove the drain plug and washer.
4. Drain the oil into a suitable container.
5. Install a new washer a ...
 Transaxle Range (TR) Switch Inspection [FS5 A EL]
CAUTION:
Water or foreign objects entering the connector can cause a poor connection
or corrosion. Be sure not to drop water or foreign objects on the connector
when disconnecting it.
...
Other materials:
Wastegate Actuator Inspection [Mzr 2.3 Disi Turbo]
1. Remove the air hose and air duct..
2. Disconnect the hose from the wastegate actuator.
3. Plug the wastegate actuator as shown in the figure.
4. Connect the vacuum pump to the port
5. Raise the pressure slowly and take a measurement of the pressure when the
rod stroke is 1.5 mm {0.0 ...
If you think something is wrong
If you observe any unusual behavior while operating your Subaru Solterra,
it may indicate that the vehicle requires inspection, adjustment, or repair. Promptly
contacting an authorized SUBARU dealer is strongly recommended to ensure continued
safety and reliability.
Visible symptoms
Fluid ...
Outer Mirror Glass Inspection
Vehicles With Heated Outer Mirror
1. Disconnect the negative battery cable..
2. Remove the outer mirror glass..
3. Verify that the resistance is as indicated in the table.
If not as indicated in the table, or if the resistance is not within the
specification, replace the outer mi ...
