Mazda 3 Service Manual: Manual Transaxle Shift Mechanism Removal/Installation [A26 M R]
1. Remove the battery cover..
2. Disconnect the negative battery cable.
3. Remove the battery and battery tray..
4. Remove the air cleaner and air inlet hose..
5. Remove the aerodynamic under cover NO.2..
6. Remove the tunnel member (rear)..
7. Remove the upper panel..
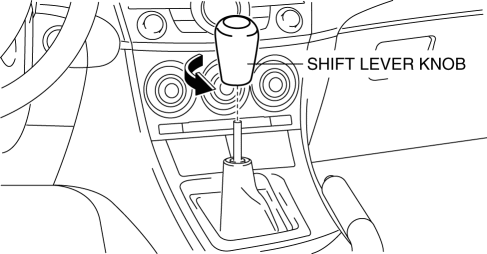
8. Remove the shift lever knob.
9. Remove the shift panel.
10. Remove the side wall..
11. Remove the console..
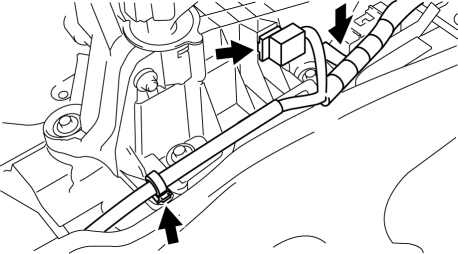
12. Detach the clip as shown in the figure.
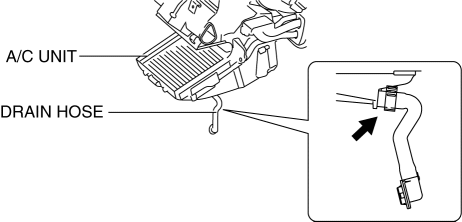
13. Disconnect the drain hose connected to A/C unit..
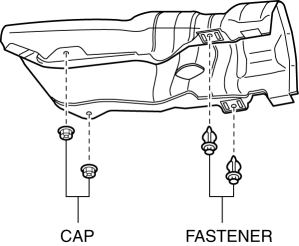
14. Remove the cap and fastener securing the insulator (front) and set the insulator (front) aside.
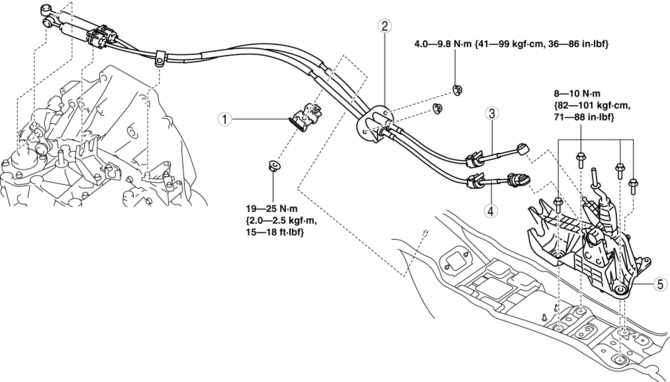
15. Remove in the order indicated in the table.
16. Install in the reverse order of removal.
17. After installation, verify that the shift lever can be shifted smoothly into each position.
|
1 |
Clip |
|
2 |
Grommet |
|
3 |
Main shift cable (See Main Shift Cable and Main Select Cable Removal Note.) |
|
4 |
Main select cable (See Main Shift Cable and Main Select Cable Removal Note.) |
|
5 |
Shift lever component |
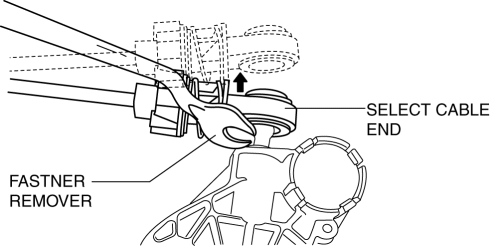
Main Shift Cable and Main Select Cable Removal Note
1. Remove the both shift cable end and select cable end using a fastener remover.
 Manual Transaxle Removal/Installation [G66 M R]
CAUTION:
Secure the steering wheel using tape or a cable to prevent the steering shaft
from rotating after disconnecting the steering shaft. If the steering wheel
rotates after the steer ...
 Manual Transaxle Shift Mechanism Removal/Installation [C66 M R]
1. Remove the battery cover..
2. Disconnect the negative battery cable..
3. Remove the shift lever.
a. Remove the upper panel..
b. Remove the shift lever knob.
c. Remove the shift panel. ...
Other materials:
Back Up Light Switch Inspection
1. Disconnect the negative battery cable..
2. Remove the battery component. (ex: battery, battery tray and PCM component)
(G35-MR,G66M-R).
3. Remove the aerodynamic under cover No.2. (G35-MR,G66M-R,C66M-R).
4. Disconnect the back-up light switch connector..
5. Verify that the continuity be ...
Information Display Input/Output Check Mode
NOTE:
In this mode, it is possible to verify the items in the following chart.
Check Code Table
Check code
Check item
Related items
01
Information display
Multi information display
...
Parking Support Brake function (moving vehicles rear of the vehicle)
In the Subaru Solterra, the Parking Support Brake system utilizes
rear radar sensors to continuously monitor traffic approaching from either side
behind the vehicle. When a moving vehicle is detected and the system determines
that the likelihood of a collision is significant, automatic brake c ...
